
 Sukhdev Kamboj
Every Windows 11 user eventually needs to clean up their system — whether it’s clearing out old downloads, removing duplicate photos, or getting rid of an entire project folder that’s no longer needed. While deleting a file might sound like one of the simplest tasks you can perform on a computer, Windows 11 actually offers several different ways to do it, each suited to different situations. You might want a quick deletion you can undo later, a permanent removal that skips the Recycle Bin entirely, or a bulk cleanup of files scattered across multiple folders.
Understanding these different methods isn’t just about convenience — it’s also about keeping your system organized, protecting your privacy when disposing of sensitive files, and avoiding the frustration of accidentally deleting something important. In this guide, we’ll walk through every practical way to delete files and folders in Windows 11, from the everyday right-click method to keyboard shortcuts, command-line tools, and settings that control how deletions behave. By the end, you’ll know exactly which method to use for any situation, along with how to recover a file if you change your mind.
Methods to Delete Files and Folders in Windows 11
Method 1: Using File Explorer (Right-Click Menu)
The most common and beginner-friendly way to delete files or folders is through File Explorer, Windows’ built-in file management tool.
Steps:
Open File Explorer by pressing Windows + E or clicking the folder icon on the taskbar.
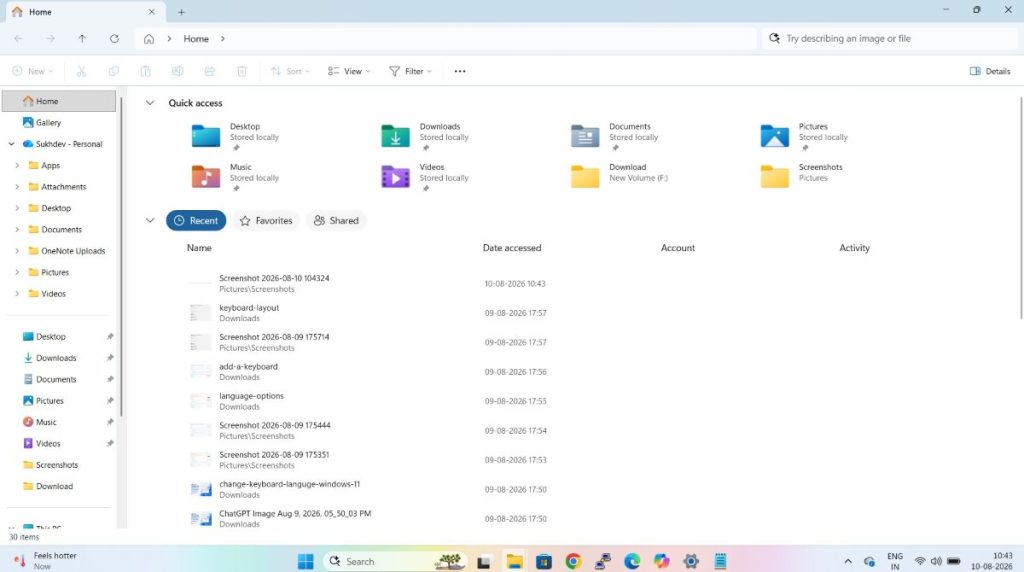
Navigate to the file or folder you want to delete.
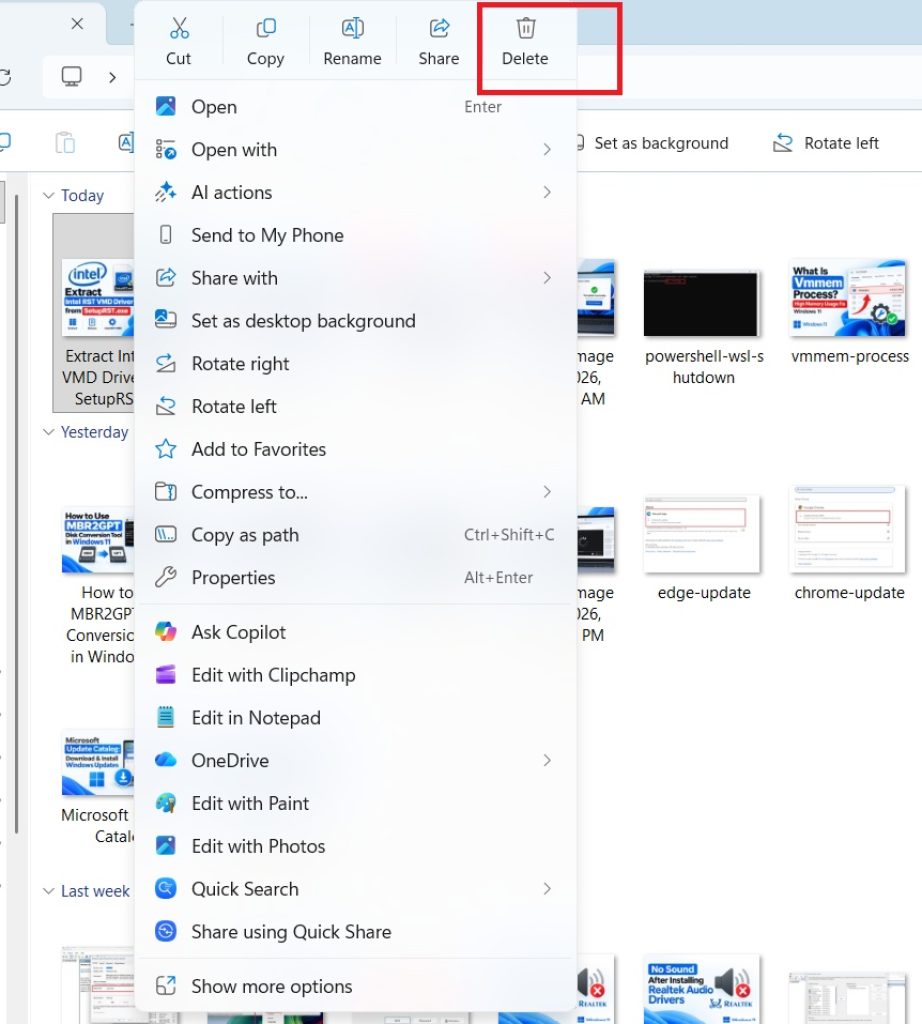
Right-click on the item. In the context menu that appears, click Delete.
The file or folder will be moved to the Recycle Bin.
If you’re using Windows 11’s simplified right-click menu, you’ll see a trash can icon along with other quick actions like Cut, Copy, and Rename — clicking that icon achieves the same result as selecting “Delete.”
This method is ideal for everyday use because it sends deleted items to the Recycle Bin, giving you a safety net in case you delete something by mistake. You can select multiple files at once by holding Ctrl and clicking each item, or by holding Shift to select a continuous range, then right-clicking any of the selected items to delete them all together.
Also Read: Delete Files Folder Using Command Prompt
Method 2: Using the Delete Key
If you prefer keyboard shortcuts over menus, this is the fastest everyday method.
Steps:
- Open File Explorer and locate the file or folder.
- Click once to select it (or select multiple items using
CtrlorShift). - Press the Delete key on your keyboard.
Like the right-click method, this sends the item to the Recycle Bin rather than deleting it permanently. It’s a quick, muscle-memory way to clean up files without touching your mouse.
Method 3: Permanently Deleting Files (Skipping the Recycle Bin)
Sometimes you want to delete a file completely, without it sitting in the Recycle Bin where it could still be recovered. This is especially useful for sensitive documents or when you’re trying to free up disk space immediately, since files in the Recycle Bin still count against your storage until it’s emptied.
Steps:
- Select the file or folder you want to permanently delete.
- Press
Shift + Deleteinstead of just Delete. - A confirmation dialog will appear warning that the item will be permanently deleted. Click Yes to confirm.
Keep in mind that this method bypasses the Recycle Bin entirely, meaning the standard undo/restore option won’t be available afterward. Only use this when you’re certain you no longer need the file, since recovering it later would require specialized data recovery software — and even then, success isn’t guaranteed.
Method 4: Emptying the Recycle Bin
Deleting a file through normal methods only moves it to the Recycle Bin — it isn’t truly gone until the Recycle Bin itself is emptied. This is a useful final step for freeing up storage space or ensuring deleted files can’t be easily recovered.
Steps to empty the entire Recycle Bin:
- Double-click the Recycle Bin icon on your desktop (or search for it using the Start menu if it’s not visible).
- Click Empty Recycle Bin in the toolbar at the top of the window.
- Confirm by clicking Yes in the pop-up dialog.
To permanently delete specific items from the Recycle Bin:
- Open the Recycle Bin.
- Select the specific file(s) you want to remove permanently.
- Right-click and choose Delete, or press
Shift + Delete.
You can also right-click the Recycle Bin icon directly on the desktop and select Empty Recycle Bin without opening it first — a quicker option if you just want to clear everything at once.
Bonus Method: Using Command Prompt or PowerShell
For advanced users comfortable with the command line, Windows 11 also allows file deletion through Command Prompt or PowerShell. This can be useful for deleting files in bulk, automating cleanup tasks, or removing files that are difficult to delete through File Explorer due to permission issues.
Using Command Prompt:
- Open the Start menu, type
cmd, and press Enter to launch Command Prompt. - To delete a file, type:
del "C:\path\to\your\file.txt"
- To delete a folder and all its contents, type:
rmdir /s /q "C:\path\to\your\folder"
Using PowerShell:
- Open the Start menu, type
PowerShell, and press Enter. - To delete a file:
Remove-Item "C:\path\to\your\file.txt"
- To delete a folder and its contents:
Remove-Item "C:\path\to\your\folder" -Recurse
Command-line deletions are typically permanent and don’t go through the Recycle Bin, so double-check file paths before pressing Enter. This method is best suited for users who are comfortable navigating directory paths and want more control or automation over their file management.
Recovering Deleted Files
Before we wrap up, it’s worth knowing how to reverse a deletion if you change your mind:
- From the Recycle Bin: Open the Recycle Bin, right-click the file, and select Restore. It will return to its original location.
- Using “Undo”: Immediately after deleting a file, you can press
Ctrl + Zin File Explorer to undo the action. - After emptying the Recycle Bin: Recovery becomes much harder. You’ll need third-party data recovery software, and even then, success depends on whether the storage space has been overwritten by new data since deletion.
This is exactly why it’s good practice to rely on the Recycle Bin for routine deletions and reserve Shift + Delete or command-line deletion for files you’re fully certain you want gone.
Conclusion
Deleting files and folders in Windows 11 is straightforward once you know the options available to you. For everyday cleanup, the right-click menu or the Delete key sends items safely to the Recycle Bin, giving you a chance to recover them if needed. When you want to remove something permanently and skip the Recycle Bin altogether, Shift + Delete gets the job done instantly. Emptying the Recycle Bin regularly helps free up storage space, while Command Prompt and PowerShell offer powerful options for advanced users who need to delete files in bulk or automate the process.
Choosing the right method comes down to your goal: use standard deletion for routine tidying where you might want a safety net, and use permanent deletion methods only when you’re confident the files are no longer needed. With these techniques in your toolkit, you’ll be able to manage your files efficiently and keep your Windows 11 system running smoothly.
Frequently Asked Questions (FAQ)
1. Can I recover a file after emptying the Recycle Bin?
Not through normal means. Once the Recycle Bin is emptied, Windows removes the file’s entry from the file system, though the actual data may still exist on the disk until it’s overwritten. Third-party data recovery tools can sometimes retrieve these files, but success isn’t guaranteed, especially if you’ve continued using the drive afterward. For sensitive files, don’t rely on this as a safety net.
2. What’s the difference between pressing Delete and Shift + Delete?
Pressing Delete moves the file or folder to the Recycle Bin, allowing you to restore it later if needed. Pressing Shift + Delete bypasses the Recycle Bin entirely and deletes the item permanently and immediately, which is faster but leaves no easy way to undo the action.
3. Why can’t I delete a certain file or folder in Windows 11?
This usually happens for one of a few reasons: the file is currently open in another program, it’s being used by a running process, you lack the necessary permissions, or it’s protected by the operating system. Try closing any programs that might be using the file, restarting your computer, or checking file permissions by right-clicking the item, selecting Properties, and reviewing the Security tab. In some cases, you may need to run File Explorer or Command Prompt as an administrator.
4. Does deleting files free up storage space immediately?
Not always. If a file is deleted normally, it moves to the Recycle Bin and still occupies disk space until the Recycle Bin is emptied. Only after emptying the Recycle Bin (or using Shift + Delete for permanent deletion) is the storage space actually marked as free for new data. If you’re trying to quickly reclaim disk space, remember to empty the Recycle Bin as a final step.





