sukh22
When Windows starts acting up — random crashes, corrupted system files, painfully slow boot times, or mysterious error messages that won’t go away no matter what you try — a full reinstall can feel like the only option. But wiping your drive and starting from scratch means losing your installed programs, digging up license keys, and spending hours setting everything back up.
A Repair Install (also called an in-place upgrade) offers a middle ground. It reinstalls the core Windows operating system files while keeping your personal files, installed applications, and most settings intact. Think of it as giving Windows a fresh set of clothes without asking it to move to a new house. It’s one of the most underused troubleshooting tools available, largely because most people don’t know it exists or assume “reinstalling Windows” always means starting over.

This guide walks through what a repair install actually does, when it’s the right fix, and several methods for performing one — from the built-in Windows tools to bootable USB media — so you can get your PC back to a stable, working state without losing your data.
What a Repair Install Actually Does
A repair install works by mounting a fresh copy of Windows (via an ISO file) and using the Setup process to essentially overwrite the operating system’s core files — the kernel, system libraries, drivers, and built-in apps — while migrating your existing user accounts, personal files, and third-party installed software into the new installation.
This is fundamentally different from:
- A clean install, which wipes the drive and starts completely fresh.
- System Restore, which rolls back to an earlier restore point (and only works if one exists).
- Reset This PC, which can optionally keep files but strips out all installed applications.
A repair install sits in between: it fixes deep, stubborn OS-level problems while preserving the “just how I like it” state of your desktop.
When You Should (and Shouldn’t) Use a Repair Install
A repair install is a good fit when you’re dealing with:
- Frequent Blue Screens of Death (BSODs) with no clear driver cause
- Corrupted system files that
SFC /scannowandDISMcan’t fix - Windows Update getting permanently stuck or repeatedly failing
- General system instability after a bad update or failed upgrade
- Slow performance that persists even after malware scans and cleanup
It’s not the right tool if:
- Your hard drive or SSD is physically failing (repair a dying drive first, or replace it)
- You suspect deep malware or rootkit infection (a clean install is safer)
- Windows won’t boot at all (a repair install requires you to boot into the existing OS in most methods)
- You just want a “fresh start” performance boost (Reset This PC or a clean install is more thorough)
Before You Start: Preparation Checklist
Regardless of which method you use, take these steps first:
- Back up your files. A repair install is generally safe for your data, but nothing is 100% guaranteed. Copy important documents, photos, and files to an external drive or cloud storage.
- Note down your software license keys for any paid programs, just in case.
- Ensure you have a stable internet connection and at least 20 GB of free disk space.
- Plug in your laptop or ensure your desktop has stable power — an interruption mid-process can cause serious problems.
- Have your Windows product key handy, though in most cases it’s not needed since the installer detects your existing digital license.
Method 1: Repair Install Using the Installation Assistant
This is the simplest method and works well if your version of Windows is outdated or acting unstable but still fully bootable.
Steps:
- Go to the official Microsoft Windows download page and download the Installation Assistant (for Windows 11) or the Update Assistant (for Windows 10).
- Run the downloaded tool and accept the license terms.
- The tool will download the latest version of Windows and prepare your PC for the upgrade.
- When prompted, choose to keep personal files and apps.
- Click Install and let your PC restart several times during the process — this can take 30 minutes to over an hour.
This method essentially forces an in-place upgrade to the latest build of Windows, which resolves most corruption issues along the way.
Method 2: Repair Install Using an ISO File and Setup.exe
This method gives you more control and is ideal if you want to repair install a specific version of Windows rather than whatever the latest build happens to be.
Steps:
- Download the Windows ISO file from Microsoft’s official Media Creation Tool or the software download page.
- Once downloaded, right-click the ISO file and select Mount. This creates a virtual DVD drive containing the installation files.
- Open the mounted drive and double-click setup.exe.
- Choose to download updates during setup (recommended) so you get the latest patches immediately.
- On the “Ready to Install” screen, confirm it says “Keep personal files and apps”. If it doesn’t, click Change what to keep and select that option.
- Click Install and wait for the process to complete, allowing your PC to restart as needed.
This is currently the most reliable and widely recommended method, since it doesn’t depend on any single vendor tool and can be reused for offline repairs once the ISO is saved locally.
Method 3: Repair Install Using Bootable USB Media
If your Windows installation is unstable enough that running setup.exe from within Windows feels risky, or if you want a reusable repair tool, creating bootable installation media is a solid alternative.
Steps:
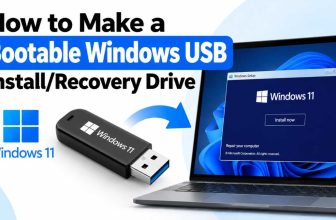
- Download the Media Creation Tool from Microsoft’s website.
- Select Create installation media for another PC and choose a USB drive (8 GB minimum).
- Once created, insert the USB drive into the problematic PC.
- Boot into Windows normally (not from the USB drive yet) and open File Explorer.
- Navigate to the USB drive and run setup.exe from within Windows — this still allows you to keep files and apps, unlike booting directly from the USB drive into the installer, which forces a clean install.
This method is particularly useful for IT technicians or anyone who repairs multiple machines, since the same USB drive can be reused repeatedly.
Method 4: Using Command Prompt with DISM and SFC as a Pre-Repair Step
Sometimes a full repair install isn’t necessary — running system file repair tools first can fix the problem outright, or at least improve your odds of a clean repair install afterward.
Steps:
- Open Command Prompt as Administrator (search “cmd,” right-click, choose Run as administrator).
- Run
DISM /Online /Cleanup-Image /RestoreHealthand let it complete — this can take 10–20 minutes. - Once finished, run
sfc /scannowto scan and repair corrupted system files using the newly restored image. - Restart your PC and check whether the original issue persists.
- If problems remain, proceed to Method 1 or Method 2 for a full repair install.
Running these commands before a repair install isn’t strictly required, but it often resolves lighter corruption issues without needing a lengthy reinstall at all — and even when it doesn’t fully fix things, it gives the subsequent repair install a healthier foundation to build from.
What Happens to Your Apps, Files, and Settings
During a repair install that keeps files and apps:
- Personal files (documents, photos, desktop items) remain untouched.
- Installed applications typically survive, though some — particularly antivirus software, VPN clients, and low-level system utilities — may need reinstalling due to how deeply they integrate with Windows.
- Most settings (desktop background, taskbar layout, default apps) are preserved, though some Windows-specific settings reset to default.
- Device drivers get refreshed with the versions bundled in the new installation, which can occasionally fix driver-related issues but may also mean you need to reinstall specialty drivers afterward.
It’s a good idea to check your installed programs list after the repair install completes, since Windows Setup keeps a log (typically saved to your desktop) listing anything that couldn’t be carried over.
Conclusion
A repair install strikes a rare balance in the world of troubleshooting: it’s thorough enough to fix deep, stubborn Windows problems, yet gentle enough to leave your files, apps, and settings largely intact. Whether you use the Installation Assistant for simplicity, mount an ISO for more control, build bootable media for repeat use, or run DISM and SFC first as a lighter-touch fix, the underlying goal is the same — repair the operating system without the disruption of a full wipe.
Before diving in, always back up your important files as a safety net, and make sure your PC has stable power and a solid internet connection throughout the process. If a repair install doesn’t resolve your issue, that’s a strong signal the problem lies outside of Windows itself — in hardware, a failing drive, or a deeper malware infection — and a clean install or professional diagnosis may be the next step.
Frequently Asked Questions
1. Will a repair install delete my files?
No, not when you choose the “Keep personal files and apps” option during setup. Your documents, photos, and other personal data remain in place. That said, it’s always wise to back up important files beforehand, since interruptions (like a power outage) during the process can occasionally cause data issues.
2. Do I need my Windows product key to do a repair install?
Usually not. If Windows was already activated on your PC before starting the repair install, it uses your existing digital license tied to your hardware or Microsoft account, and reactivates automatically after the process finishes. Having your key on hand is still a good safety measure in case something goes wrong.
3. How long does a repair install take?
It typically takes between 30 minutes and 2 hours, depending on your PC’s speed, the version of Windows, and how much data is on the drive. Solid-state drives (SSDs) complete the process noticeably faster than traditional hard drives (HDDs).
4. What’s the difference between a repair install and “Reset This PC”?
A repair install (in-place upgrade) can keep both your personal files and your installed applications. “Reset This PC,” even with the “Keep my files” option, removes all installed applications and reverts most settings to default — it only preserves personal data, not your software setup.