Geeksdigit Team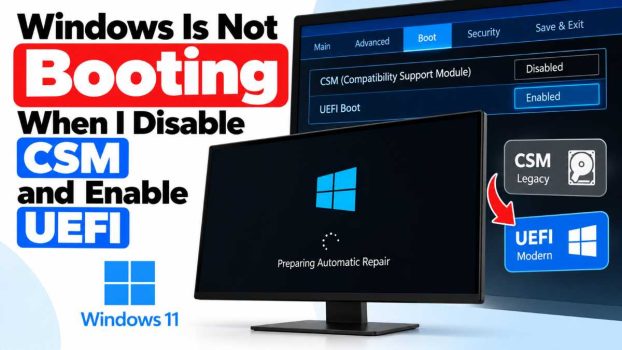
You open your BIOS, disable CSM (Compatibility Support Module), switch to pure UEFI mode, save and restart. Instead of the Windows logo, you get a black screen, a “No bootable device” message, or a boot loop that drops you back into the BIOS.
This is one of the most common problems after a BIOS change, and it usually isn’t a sign that your drive or Windows is broken. The cause is almost always a mismatch between how Windows was installed and how your motherboard is now trying to boot it.
- Legacy BIOS/CSM mode boots from drives partitioned as MBR and looks for a boot loader in the drive’s first sector.
- UEFI mode boots only from drives partitioned as GPT with a small EFI System Partition (ESP) holding the boot files.

If Windows was installed in Legacy/CSM mode, it sits on an MBR disk with no ESP. Once CSM is off, the firmware can’t find anything it recognizes as bootable. Features such as Secure Boot, Windows 11 compatibility, and fast startup often push people to make this switch, so it’s worth doing correctly.
Below are seven methods, ordered from least to most invasive. Start at the top and stop when Windows boots.
Before you begin: if you can still reach your data, back up important files. Several fixes below modify the disk’s partition table. Have a Windows installation USB ready too (create one with Microsoft’s Media Creation Tool on another PC).
1. Re-Enable CSM Temporarily to Confirm the Cause
Before changing anything else, verify that the disk layout is the problem.
- Restart and enter the BIOS (usually Del, F2, F10, or Esc).
- Set CSM/Legacy Support back to Enabled (or Boot Mode to Legacy or Legacy + UEFI).
- Save and exit.
If Windows boots normally, your installation is in Legacy/MBR mode. That confirms you need to convert the disk (Method 2) or reinstall in UEFI mode (Method 7). If Windows still doesn’t boot with CSM on, the problem lies elsewhere, so skip ahead to Methods 3 and 4.
To confirm the current mode once you’re in Windows:
- Press Win + R, type msinfo32, and press Enter.
- Look at BIOS Mode. If it says Legacy, Windows is installed in legacy mode.
- Open Disk Management (right-click Start), right-click your system disk, choose Properties > Volumes, and check the Partition style. Master Boot Record (MBR) means it needs converting for UEFI.
This diagnostic step takes two minutes and prevents you from trying fixes that don’t apply.
2. Convert MBR to GPT with MBR2GPT (No Data Loss)
This is the cleanest fix. Microsoft’s built-in MBR2GPT tool converts the disk to GPT without wiping your files, and it creates the EFI System Partition automatically. It works on Windows 10 (version 1703 and later) and Windows 11.
Steps (from within Windows, with CSM still enabled):
- Open Command Prompt as Administrator.
- Identify your disk number by typing
diskpart, thenlist disk, thenexit. Usually it’s disk 0. - Validate the disk:
mbr2gpt /validate /disk:0 /allowFullOS- If validation succeeds, convert:
mbr2gpt /convert /disk:0 /allowFullOS- Restart, enter the BIOS, disable CSM, set the boot mode to UEFI, and select Windows Boot Manager as the first boot option.
If validation fails: the most common reason is too many partitions. MBR disks are limited to four primary partitions, and MBR2GPT needs room to create the ESP. Delete or merge an unneeded recovery partition (with care), or shrink a partition in Disk Management to free up space, then validate again.
If Windows is already unbootable: boot from your Windows installation USB, press Shift + F10 to open Command Prompt, and run the same commands without /allowFullOS:
mbr2gpt /validate /disk:0
mbr2gpt /convert /disk:0
Then switch to UEFI in the BIOS. For most users, this single method solves the problem completely.
3. Rebuild the Boot Files with bcdboot
If your disk is already GPT (or you just converted it) but Windows still won’t boot in UEFI mode, the EFI boot files may be missing or corrupted. You can rebuild them manually.
Steps:
- Boot from the Windows installation USB (in UEFI mode, which shows the USB entry with “UEFI:” in the boot menu).
- Choose Repair your computer > Troubleshoot > Command Prompt.
- Run
diskpart, then:
list disk
select disk 0
list partition- Find the small partition (usually 100-500 MB, type System) and select it:
select partition 1
assign letter=S
exit- Find your Windows drive letter. In recovery it’s often D: or C:. Confirm with
dir D:\, and look for the Windows folder. - Copy fresh boot files to the EFI partition:
bcdboot D:\Windows /s S: /f UEFI- You should see “Boot files successfully created.” Restart and check the boot order in the BIOS.
If there’s no EFI partition at all, create one first. In diskpart, shrink a partition to free 300 MB, then run create partition efi size=300, format quick fs=fat32, and assign letter=S, then run the bcdboot command above. This method fixes the majority of “Windows Boot Manager missing” situations.
4. Fix BIOS Boot Settings and Boot Order
Sometimes Windows and the disk are fine, and the firmware simply isn’t pointed at the right place. When you switch from CSM to UEFI, your boot list is reset or reordered, and your drive may not show up under its new UEFI name.
Check the following in the BIOS:
- Boot Option #1: select Windows Boot Manager, not the drive’s brand name. If it doesn’t appear, the ESP is missing or damaged, so return to Method 3.
- Boot Mode / OS Type: set to UEFI or Windows 10/11 WHQL Support (wording varies by manufacturer). Avoid “Other OS,” which can cause Secure Boot to block Windows.
- Secure Boot: temporarily set it to Disabled to test. If Windows boots with Secure Boot off, enable it again later after confirming your keys are properly installed (or use “Restore factory keys”).
- SATA Mode: keep it on AHCI. Switching to RAID/Intel RST, or from IDE to AHCI, without preparation can also cause a boot failure or a 0x7B blue screen.
- Fast Boot: disable it while troubleshooting, since it can skip device initialization.
Save with F10 and restart. If you are unsure which options apply to your board, look up your motherboard manual for the exact menu names, since ASUS, MSI, Gigabyte, Dell, HP, and Lenovo all label them differently.
5. Run Startup Repair and the bootrec Tools
Windows has automatic repair tools that can rebuild boot configuration data. They work best on GPT/UEFI systems after the disk layout is correct.
Startup Repair:
- Boot from the Windows USB in UEFI mode.
- Select Repair your computer > Troubleshoot > Advanced options > Startup Repair.
- Pick your Windows installation and let it run. It may reboot a few times.
Manual repair with bootrec: in the recovery Command Prompt, run these in order:
bootrec /scanos
bootrec /fixboot
bootrec /rebuildbcd
If bootrec /fixboot returns “Access is denied,” you’re likely on a UEFI/GPT system where the ESP needs a drive letter. Assign one as shown in Method 3 and run bootsect /nt60 S: /force /mbr or, better, use bcdboot instead.
Check the disk for errors while you’re there:
chkdsk C: /f /r
sfc /scannow /offbootdir=C:\ /offwindir=C:\Windows
Swap the drive letters for whatever your Windows partition uses in recovery mode. Startup Repair alone rarely fixes an MBR-to-UEFI mismatch, but it helps clean up leftover corruption.
6. Check Your Graphics Card, Cables, and Firmware (Black Screen Cases)
If the system appears to start (fans spin, drive lights blink) but you only see a black screen, the culprit may not be Windows at all.
Graphics card without UEFI GOP support. Older GPUs (roughly pre-2012 for NVIDIA and AMD) lack a UEFI-compatible video firmware called GOP (Graphics Output Protocol). With CSM disabled, the card can’t output video during startup, and the screen stays black even though Windows may be loading fine.
Try these:
- Plug your monitor into the motherboard’s integrated video port (if your CPU has integrated graphics) and see if Windows boots.
- Try a different port on the GPU (HDMI vs DisplayPort).
- Check your GPU maker’s site for a UEFI/GOP firmware update for your card.
- If the card is truly old, re-enable CSM and stay in Legacy mode, or replace the card.
Other things to check:
- Update the BIOS/UEFI firmware. Manufacturers regularly fix boot bugs and compatibility issues. Follow the vendor’s instructions carefully and never interrupt a flash.
- Reset CMOS. Clear the settings by removing the CMOS battery for a few minutes or using the jumper. Then re-enter the BIOS and configure UEFI mode from scratch.
- Reseat cables and drives. Make sure the SATA or NVMe drive is detected in the BIOS. If the drive isn’t listed, that’s a hardware problem, not a boot configuration one.
- Disconnect other drives. A second disk with its own boot files can confuse the firmware. Unplug extra drives and test with the system drive alone.
7. Perform a Clean Install of Windows in UEFI Mode
If nothing above works, or your disk is badly corrupted, a clean installation in UEFI mode gives you a properly configured GPT disk from the start. This erases the disk, so back up your files first.
Steps:
- Create a Windows installation USB with the Media Creation Tool (on Windows 11 or 10).
- Enter the BIOS, disable CSM, set UEFI mode, and choose the USB entry labeled “UEFI: [your USB name]” in the boot menu. If you pick the non-UEFI entry, the installer will run in legacy mode and you’ll end up with the same problem.
- During setup, choose Custom: Install Windows only.
- Delete all partitions on the target disk until it shows as Unallocated Space. (Windows will convert to GPT automatically when installing in UEFI mode.)
- Select the unallocated space and click Next. Windows will create the ESP, MSR, and primary partitions itself.
- Complete setup, then install drivers and restore your files.
A fresh UEFI install eliminates leftover MBR data, corrupt boot records, and stray partitions. It’s the most time-consuming option, but it guarantees a matching setup between your firmware and Windows.
Conclusion
When Windows won’t boot after you disable CSM and enable UEFI, the cause is nearly always the same: Windows lives on an MBR disk that a UEFI-only firmware can’t boot. Start by re-enabling CSM to confirm the diagnosis, then convert the disk to GPT with MBR2GPT, which preserves your data and solves most cases in minutes. If the boot files are missing or corrupted, rebuild them with bcdboot. From there, verify your BIOS boot order, Secure Boot, and SATA settings, run Startup Repair, and rule out hardware issues such as a GPU without GOP support. A clean UEFI installation is the last resort.
Work through the methods in order, make a backup before touching partitions, and you should be running Windows in full UEFI mode, with the benefits of faster startup, Secure Boot, and Windows 11 compatibility, without losing your files.
Frequently Asked Questions (FAQ)
1. Should I disable CSM and use UEFI mode?
Generally yes, if your hardware supports it. UEFI mode enables Secure Boot, faster startup, support for drives larger than 2 TB, and is required for Windows 11. The exception is older hardware, such as GPUs without GOP support or legacy operating systems, where keeping CSM enabled may be necessary.
2. Can I switch from Legacy to UEFI without reinstalling Windows?
Yes. Use Microsoft’s MBR2GPT tool to convert the system disk from MBR to GPT while keeping your files and programs intact. After the conversion, disable CSM and set the BIOS to UEFI mode. Make a backup first as a precaution.
3. Why does my screen stay black after I disable CSM?
A black screen with spinning fans usually means your graphics card doesn’t support UEFI GOP, so it can’t display anything without CSM. Try the motherboard’s integrated video output, update the GPU firmware if available, or re-enable CSM. If you see the BIOS but Windows fails to load, the problem is more likely a disk/boot file mismatch.
4. Will converting MBR to GPT delete my data?
Not when using MBR2GPT, which is designed to convert the partition table without erasing your files. Still, no partition operation is risk-free, so back up important data beforehand. Third-party partition managers that offer MBR-to-GPT conversion are an alternative, but the same backup advice applies. A clean installation, by contrast, does erase everything on the disk.