
 Sukhdev Kamboj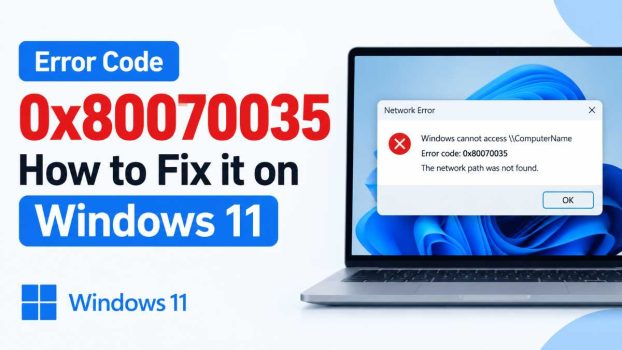
If you are trying to access a shared folder, another computer, network drive, or shared printer on Windows 11 and receive Error Code 0x80070035 – The network path was not found, Windows cannot establish a connection to the network location you requested.
This error commonly appears when you enter a path such as \\ComputerName\SharedFolder in File Explorer, attempt to access another PC from the Network section, or connect to a shared resource on a local network. It does not necessarily mean that the other computer is offline. In many cases, the computers are connected to the same router, but Windows networking, discovery, sharing permissions, firewall rules, or required services are preventing the connection.
Fortunately, Error 0x80070035 can usually be fixed without reinstalling Windows. In this guide, we will go through several methods, starting with the simplest network checks and progressing to Windows services, firewall settings, network commands, and SMB-related troubleshooting.
What Does Error 0x80070035 Mean?
The full message generally looks like this:
Windows cannot access
\\ComputerName
Error code: 0x80070035
The network path was not found.
The error means Windows was unable to locate or establish access to the requested network path.
For example, suppose you have two computers:
- PC-1 — your current Windows 11 computer
- PC-2 — another computer containing a shared folder
You might try to open:
\\PC-2\Documents
If Windows cannot locate PC-2 or communicate with its shared resources, you may receive 0x80070035.
The underlying cause can be different from one computer to another. Common causes include:
- Computers are connected to different networks
- Network profile is set to Public
- Network discovery is disabled
- File and printer sharing is disabled
- Required Windows networking services are stopped
- Windows Firewall is blocking file sharing
- DNS or computer-name resolution is failing
- Network settings are corrupted
- Incorrect sharing permissions
- Incorrect network credentials
- Compatibility problems with older SMB devices
The best approach is therefore to troubleshoot the connection systematically.
Method 1: Make Sure Both Computers Are on the Same Network
Before changing Windows settings, check the most basic requirement: both computers must be connected to the same local network.
For example, if your desktop is connected to your home router while the laptop is connected to a different Wi-Fi network, Windows file sharing will normally not work between them.
On both computers:
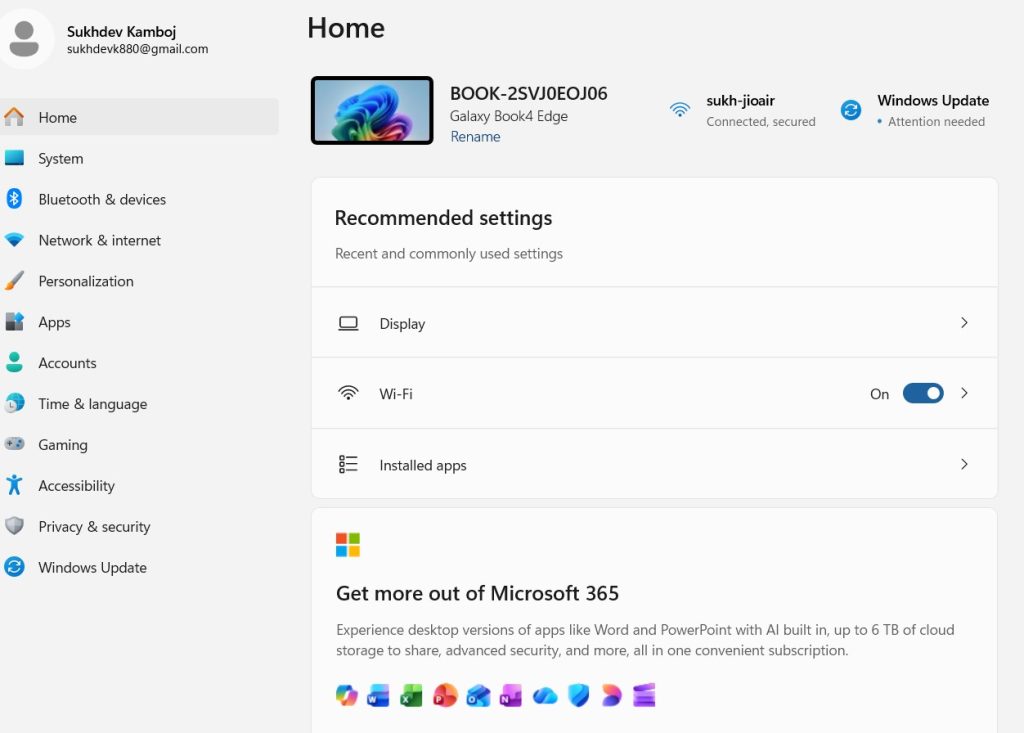
Open Settings.
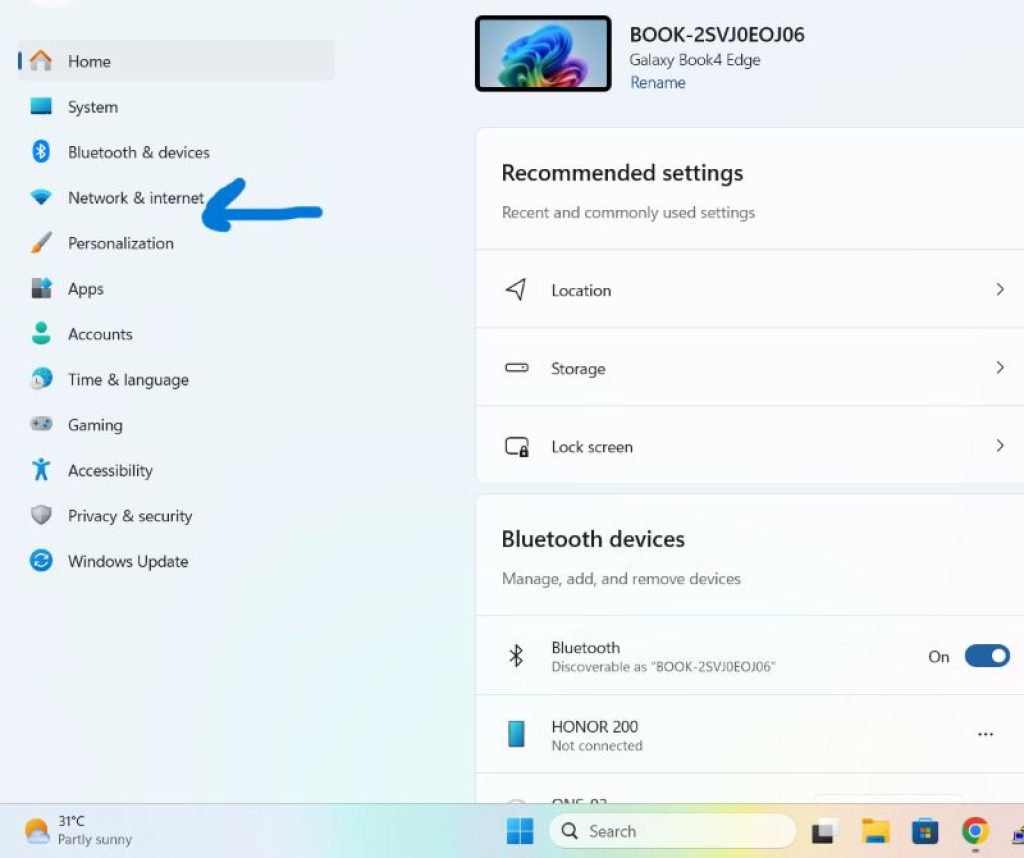
Select Network & internet.
Check whether the computers are connected through Wi-Fi or Ethernet.
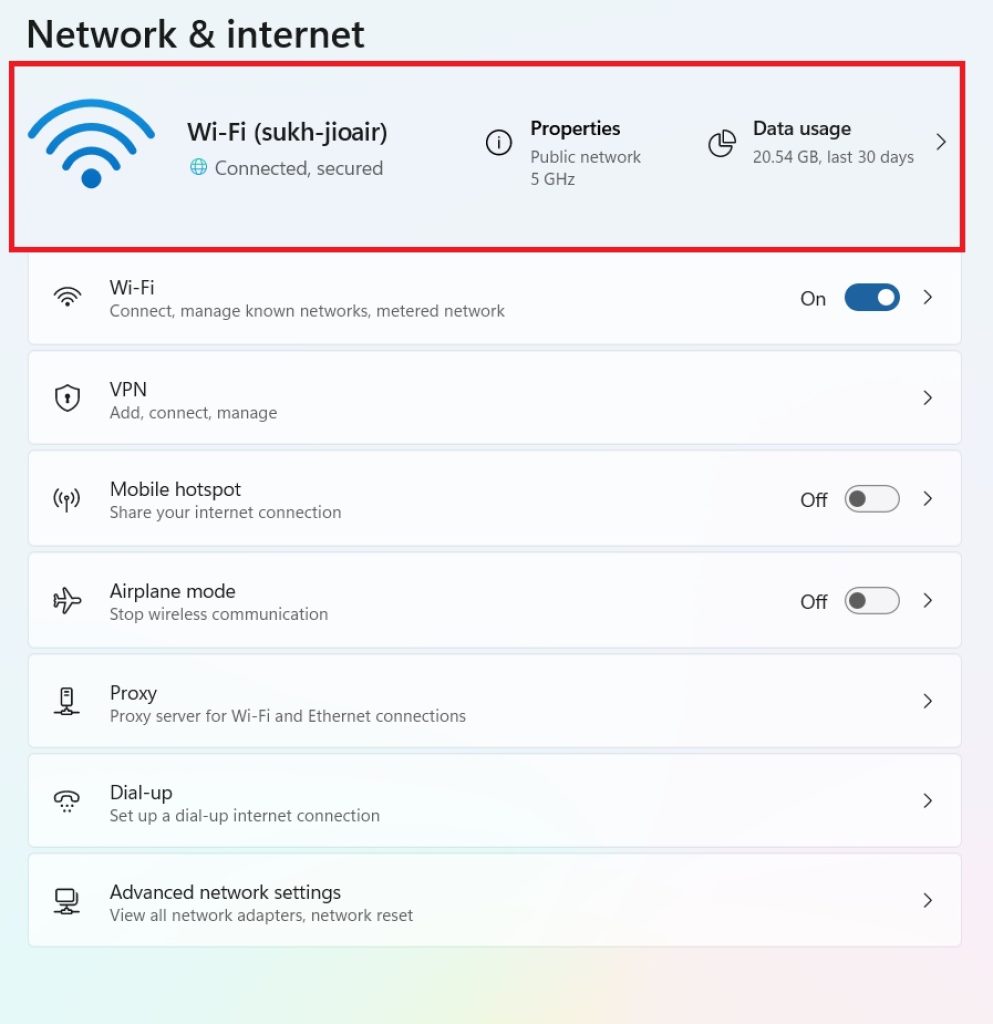
Verify that they are connected to the same local network.
If one computer is connected to a guest Wi-Fi network, it may also be isolated from other devices.
After confirming the network, restart both computers and try opening the shared path again.
You can also test the connection using the computer’s IP address rather than its name.
For example:
\\192.168.1.25
If the IP address works but the computer name does not, the problem may involve name resolution rather than file sharing itself.
Method 2: Set the Network Profile to Private
Windows 11 treats Public networks differently from Private networks.
A Public network is designed to keep your computer hidden from other devices. A Private network allows trusted devices to discover your PC and use services such as file and printer sharing. Microsoft specifically notes that Private networks are appropriate when you trust the devices and want to share files or printers.
To change the network profile:
- Open Settings.
- Select Network & internet.
- Select Wi-Fi or Ethernet, depending on your connection.
- Select the connected network.
- Find Network profile type.
- Select Private network.
Only use this setting on a network you trust, such as your home or trusted workplace network.
Now restart File Explorer and try accessing the shared computer again.
Method 3: Turn On Network Discovery and File and Printer Sharing
This is one of the most common solutions for 0x80070035.
Windows uses Network Discovery to find other devices on your local network. File and Printer Sharing allows network devices to access shared folders and printers.
Microsoft’s current Windows 11 instructions place these options under Settings > Network & internet > Advanced network settings > Advanced sharing settings.
Follow these steps:
- Open Settings.
- Go to Network & internet.
- Select Advanced network settings.
- Select Advanced sharing settings.
- Expand Private networks.
- Turn on:
- Network discovery
- File and printer sharing
If you are troubleshooting a trusted home network, you can also review the settings under All networks.
After changing these options, close Settings and restart the computer.
Try accessing the computer again from File Explorer.
Method 4: Make Sure the Shared Folder Is Actually Shared
Sometimes the problem is not with the client computer at all. The folder you are trying to access may simply not be shared correctly.
On the computer containing the folder:
- Right-click the folder.
- Select Show more options.
- Select Give access to.
- Choose Specific people.
- Select the appropriate user or Everyone, depending on your intended setup.
- Complete the sharing process.
Microsoft recommends using File Explorer’s sharing controls to share folders over a local network.
You should also verify that the folder’s permissions allow the account you are using to access it.
If you are unsure whether sharing is working on the host computer, open File Explorer and enter:
\\localhost
Microsoft documents this as a way to see shared resources available on the local computer.
Method 5: Start the Required Network Discovery Services
Windows relies on several background services for network discovery and device visibility.
If these services are disabled or stopped, another computer may fail to appear in Network, or Windows may be unable to locate it.
To check them:
- Press Windows + R.
- Type:
services.msc
- Press Enter.
Look for these services:
- Function Discovery Provider Host
- Function Discovery Resource Publication
- SSDP Discovery
- UPnP Device Host
For each service:
- Double-click it.
- If it is stopped, select Start.
- Set Startup type to Automatic.
- Select Apply.
- Select OK.
Microsoft specifically recommends these services when troubleshooting Windows network file-sharing problems.
Restart the computer after making the changes.
Method 6: Check Windows Firewall
Windows Firewall can sometimes prevent network discovery or file-sharing traffic.
You should not permanently disable Windows Firewall just to test this problem. Instead, make sure the appropriate sharing features are allowed.
To check:
- Open Windows Security.
- Select Firewall & network protection.
- Select Allow an app through firewall.
- Look for Network Discovery and File and Printer Sharing.
- Make sure the appropriate Private network permissions are enabled.
If you use a third-party security program, VPN, or firewall, temporarily check its network-sharing settings as well.
A VPN can also place your computer on a different virtual network and interfere with local network discovery. If you are using a VPN, disconnect it temporarily and test the connection again.
Method 7: Try the Computer’s IP Address
If the computer name is not resolving correctly, connecting through its IP address can help identify the cause.
First, find the IP address of the computer hosting the shared folder.
On the host computer:
- Open Settings.
- Select Network & internet.
- Select Wi-Fi or Ethernet.
- Open the connected network.
- Find the IPv4 address.
Suppose the address is:
192.168.1.25
On your Windows 11 computer, open File Explorer and enter:
\\192.168.1.25
If that works but this does not:
\\ComputerName
then the basic network connection is probably working and the issue may be related to computer-name resolution.
If neither works, continue with the next methods.
Method 8: Reset Windows Network Settings
Corrupted or incorrectly configured network components can cause persistent connectivity problems.
Windows 11 provides a built-in network reset option.
Go to:
Settings > Network & internet > Advanced network settings > Network reset
Select Reset now and follow the instructions.
Windows will restart the computer and reinstall the network adapters.
Keep in mind that a network reset can remove saved network configurations, so you may need to reconnect to Wi-Fi afterward.
Use this method after trying the simpler solutions rather than as the first step.
Method 9: Reset Network Components Using Command Prompt
You can also reset several networking components from an elevated Command Prompt.
Right-click Start and select Terminal (Admin).
Run these commands one at a time:
netsh winsock reset
netsh int ip reset
ipconfig /flushdns
ipconfig /release
ipconfig /renew
After running the commands, restart Windows.
These commands reset Winsock, reset TCP/IP configuration, clear the DNS cache, and obtain a fresh IP configuration.
Then test the network share again.
Method 10: Check SMB Compatibility
Windows file sharing commonly uses SMB (Server Message Block).
If you are connecting to a modern Windows 11 computer, you generally should not enable SMB 1.0 simply because you see Error 0x80070035. SMB 1.0 is an old protocol and should only be considered when you are connecting to an older device that specifically requires it.
For example, an old NAS device, legacy Windows computer, or outdated network storage system may depend on SMB 1.0.
If you know the remote device requires SMB 1.0:
- Press Windows + R.
- Type:
optionalfeatures
- Press Enter.
- Look for SMB 1.0/CIFS File Sharing Support.
- Enable only the component required by the legacy device.
- Restart Windows.
Do not enable SMB 1.0 as a general-purpose fix when both computers are modern Windows 11 systems. Keeping obsolete protocols disabled is generally preferable from a security perspective.
What to Do If Nothing Works
If you have followed all the methods above and 0x80070035 continues to appear, try to determine exactly where the connection is failing.
First, test:
\\ComputerName
Then test:
\\IP-Address
If the IP address works but the computer name does not, investigate name resolution.
If neither works, check:
- Whether the host computer is turned on
- Whether both computers are on the same LAN
- Network profile
- Network Discovery
- File and Printer Sharing
- Windows Firewall
- Required services
- Folder sharing permissions
- User credentials
- VPN or third-party firewall software
- SMB compatibility with older devices
For shared printers, Microsoft similarly recommends confirming that both devices are on the same network, Network Discovery and File and Printer Sharing are enabled, and the shared resource is correctly configured.
Conclusion
Error Code 0x80070035 – The network path was not found is primarily a network-sharing connectivity problem in Windows 11. It commonly occurs when Windows cannot discover or communicate with another computer or shared resource on the local network.
Start with the simplest solutions: make sure both computers are connected to the same network, set the trusted network to Private, and enable Network Discovery and File and Printer Sharing. Microsoft recommends these settings when troubleshooting local Windows file sharing.
If that does not solve the problem, check the Function Discovery services, firewall permissions, sharing permissions, credentials, and the remote computer’s IP address. Network reset and command-line network resets can help when Windows networking components have become misconfigured.
For older network devices, investigate SMB compatibility separately rather than immediately enabling SMB 1.0. On modern Windows 11 systems, keeping older protocols disabled is the safer approach.
In most cases, working through these methods in order will identify whether the problem is caused by network connectivity, discovery, Windows services, permissions, name resolution, or compatibility.
Frequently Asked Questions
1. What causes Error 0x80070035 in Windows 11?
The error means Windows cannot find or establish a connection to the requested network path. Common causes include disabled Network Discovery, disabled File and Printer Sharing, an incorrect network profile, stopped networking services, firewall restrictions, incorrect computer names, or problems with the shared folder configuration.
2. How do I fix 0x80070035 quickly?
First make sure both computers are connected to the same network. Then set the trusted network to Private and enable Network Discovery and File and Printer Sharing under Settings > Network & internet > Advanced network settings > Advanced sharing settings. Microsoft recommends these settings for Windows network sharing.
3. Should I enable SMB 1.0 to fix 0x80070035?
Not normally. SMB 1.0 is an old protocol. You should consider enabling it only when connecting to an older device that specifically requires SMB 1.0. For modern Windows 11 computers, first troubleshoot network discovery, sharing, services, firewall settings, credentials, and SMB configuration.
4. Why can I access a shared computer by IP address but not by its name?
This usually indicates that the basic network connection is working but Windows is having trouble resolving the computer name. You can continue using the IP address as a temporary workaround while investigating name resolution, network discovery, and related Windows networking services.





