
 Olivia Harper
Shell scripts, saved with the .sh extension, are one of the most common ways developers automate tasks on Linux and macOS. But if you’re a Windows 11 user, you’ve probably run into a frustrating wall: double-clicking a .sh file does nothing, or worse, Windows asks you to pick a program to open it with. That’s because shell scripts are written for Unix-based shells like Bash, and Windows doesn’t natively understand that syntax.
The good news is that running shell script files in Windows 11 is entirely possible, and you don’t need to switch operating systems to do it. Microsoft has made huge strides in Linux compatibility over the past few years, and there are now multiple reliable ways to execute .sh files directly on your Windows machine — whether you’re a developer testing cross-platform code, a student working through a Linux course, or an IT professional managing automation scripts.

In this guide, you’ll learn four proven methods to run shell scripts in Windows 11, ranked from the most modern and recommended approach to lightweight alternatives that don’t require heavy installations. We’ll also cover common errors you might encounter and answer the most frequently asked questions about running .sh files on Windows.
By the end of this article, you’ll know exactly which method suits your workflow best, whether you need full Linux compatibility or just a quick way to run a simple script.
Why Doesn’t Windows 11 Run Shell Scripts by Default?
Before diving into the methods, it helps to understand why this issue exists in the first place. Shell scripts are plain text files that contain a sequence of commands meant to be interpreted by a Unix shell — most commonly Bash, sh, or zsh. Windows, on the other hand, uses its own command-line environments: Command Prompt (cmd.exe) and PowerShell, which rely on different scripting languages (batch files .bat and PowerShell scripts .ps1).
Because these environments speak different “languages,” Windows has no built-in interpreter for Bash syntax. To run a .sh file, you need to either:
- Install a Linux-compatible environment on top of Windows, or
- Use a tool that translates or emulates a Unix shell.
Both approaches are covered in the methods below.
Method 1: Run Shell Scripts Using Windows Subsystem for Linux (WSL)
The Windows Subsystem for Linux (WSL) is Microsoft’s official solution for running a genuine Linux environment inside Windows 11. It’s the most powerful and recommended method because it runs an actual Linux kernel, meaning shell scripts behave exactly as they would on a native Linux machine.
Step 1: Install WSL
Open PowerShell or Command Prompt as Administrator.
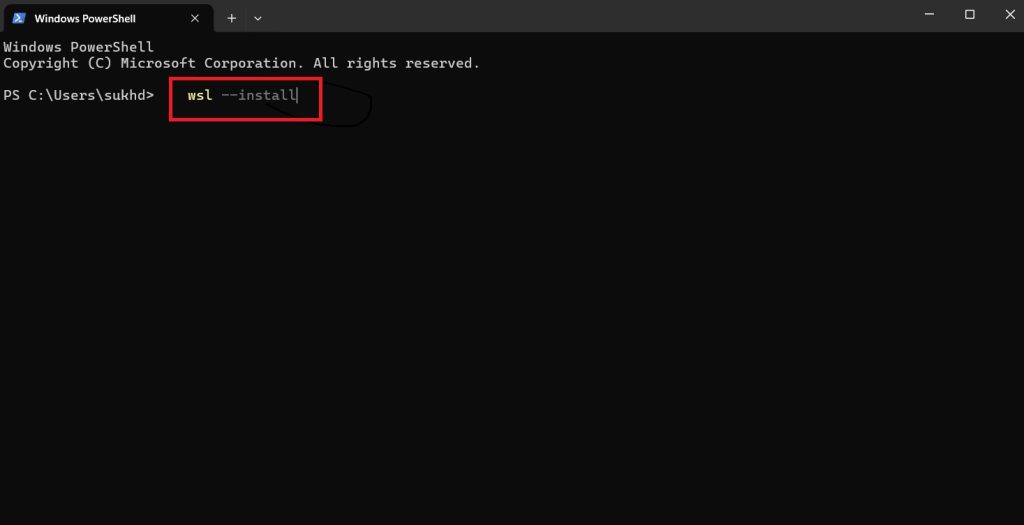
Run the following command:
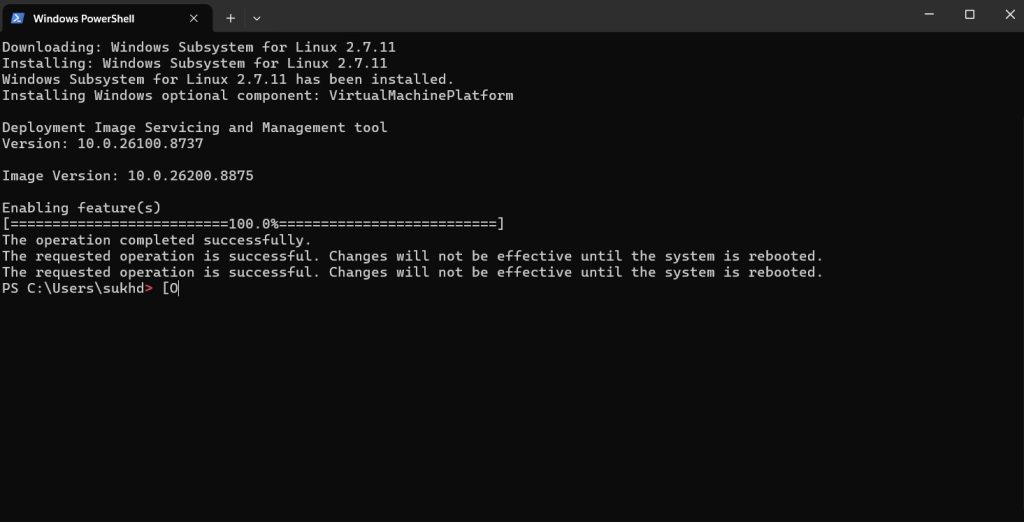
wsl --installThis installs WSL along with a default Linux distribution (usually Ubuntu). Restart your computer if prompted.
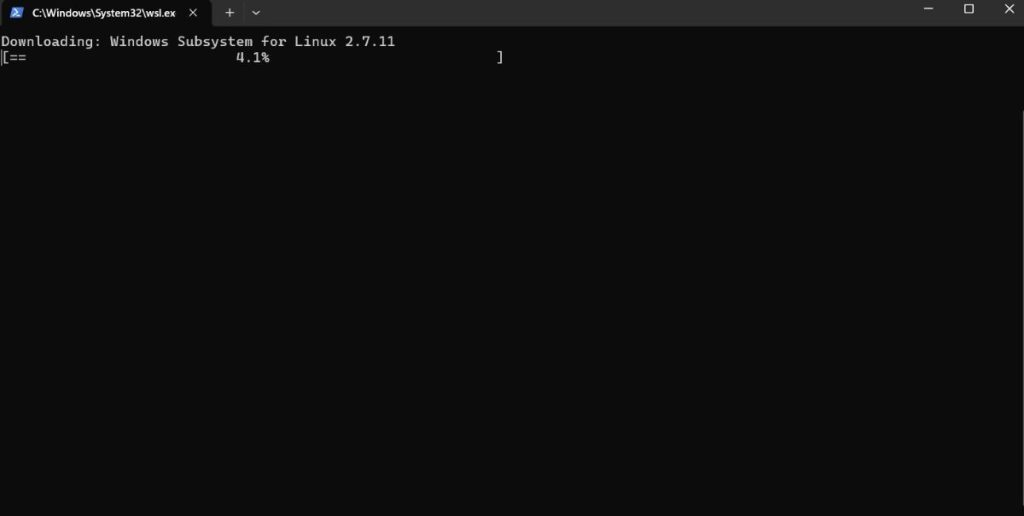
After restarting, launch Ubuntu (or your chosen distro) from the Start menu and create a Linux username and password when prompted.
Step 2: Navigate to Your Script
Your Windows drives are automatically mounted inside WSL under /mnt/. For example, a script saved in C:\Scripts\myscript.sh can be accessed at:
cd /mnt/c/ScriptsStep 3: Make the Script Executable
Linux requires execute permissions before running a script. Set this with:
chmod +x myscript.shStep 4: Run the Script
Execute the script using:
./myscript.shAlternatively, you can run it without changing permissions by calling the Bash interpreter directly:
bash myscript.shWhy Choose WSL?
WSL offers full compatibility with Linux commands, package managers (like apt), and development tools. It’s ideal for developers who regularly work with Linux-based projects, Docker, or need a persistent Linux file system alongside Windows.
Method 2: Run Shell Scripts Using Git Bash
If you already have Git installed on your Windows 11 machine — or don’t want the overhead of a full Linux subsystem — Git Bash is a lightweight and highly convenient alternative. It bundles a Bash emulation environment that can run most standard shell scripts.
Step 1: Install Git Bash
- Download Git for Windows from the official Git website.
- Run the installer and accept the default settings (Git Bash is included automatically).
Step 2: Open Git Bash
Right-click inside the folder containing your .sh file in File Explorer and select “Git Bash Here”. This opens a Bash terminal directly in that directory.
Step 3: Run the Script
Use either of these commands:
./myscript.shor
bash myscript.shIf you get a permissions error, grant execute rights first:
chmod +x myscript.shWhy Choose Git Bash?
Git Bash is fast to install, requires no system restart, and doesn’t need administrator privileges to set up in most cases. It’s an excellent choice for simple scripts, especially if you’re already using Git for version control. However, it’s a Unix-like emulation layer rather than a true Linux kernel, so highly complex scripts relying on Linux-specific system calls may not work perfectly.
Method 3: Run Shell Scripts Using Cygwin
Cygwin is a long-standing tool that provides a Unix-like environment and command-line interface for Windows. It’s a solid option if you need broader compatibility than Git Bash but don’t want to install WSL.
Step 1: Download and Install Cygwin
- Go to the official Cygwin website and download the setup executable.
- Run the installer and choose a download mirror.
- During installation, search for and select the bash package (and any other utilities you may need, such as
coreutilsorwget). - Complete the installation.
Step 2: Open the Cygwin Terminal
Launch Cygwin from the Start menu. This opens a terminal window similar to a Linux shell.
Step 3: Navigate to Your Script
Cygwin uses a similar mount structure to WSL. Your C: drive is typically found at:
cd /cygdrive/c/ScriptsStep 4: Run the Script
chmod +x myscript.sh
./myscript.sh
Why Choose Cygwin?
Cygwin has been around since the 1990s and offers a mature, stable set of Unix tools. It’s a good middle-ground option, though its setup process is more involved than Git Bash, and it doesn’t provide the same level of full Linux kernel compatibility as WSL.
Method 4: Run Shell Scripts Using PowerShell (with WSL or Bash Interpreter)
If you prefer working from PowerShell rather than switching to a separate terminal application, you can still execute shell scripts directly from it — provided WSL, Git Bash, or Cygwin is already installed on your system. This method is useful for integrating shell script execution into larger PowerShell automation workflows.
Option A: Call WSL from PowerShell
If WSL is installed, you can run a shell script without leaving PowerShell:
wsl bash myscript.shOr, if your script is in a Windows path:
wsl bash -c "/mnt/c/Scripts/myscript.sh"Option B: Call Git Bash from PowerShell
If Git Bash is installed, locate its bash.exe (commonly at C:\Program Files\Git\bin\bash.exe) and run:
& "C:\Program Files\Git\bin\bash.exe" -c "./myscript.sh"Why Choose This Method?
This approach is best for developers who want to trigger shell scripts as part of a larger PowerShell script or automation pipeline — for example, running a .sh file as one step in a broader Windows-based CI/CD or deployment process, without manually switching terminal environments.
Comparing the Four Methods
| Method | Best For | Setup Difficulty | Full Linux Compatibility |
|---|---|---|---|
| WSL | Developers needing a full Linux environment | Moderate | Yes |
| Git Bash | Quick, lightweight script execution | Easy | Partial |
| Cygwin | Broader Unix tool compatibility | Moderate | Partial |
| PowerShell + WSL/Git Bash | Automation and scripting pipelines | Depends on prerequisite | Depends on backend |
If you regularly work with Linux-based development, WSL is the clear winner. For occasional or simple scripts, Git Bash offers the fastest path with minimal setup.
Common Errors and Troubleshooting Tips
“Permission denied” error This usually means the script lacks execute permissions. Run chmod +x scriptname.sh before executing it again.
“Bad interpreter” or “No such file or directory” error This often happens when a script created on Windows has different line endings (CRLF instead of LF). Convert the file using a tool like dos2unix, or run:
sed -i 's/\r$//' myscript.sh“Command not found” errors inside the script Some scripts rely on Linux-only commands or packages that aren’t installed by default. In WSL, install missing packages using sudo apt install <package-name>.
Script runs but produces unexpected output This can occur in Git Bash or Cygwin if the script depends on Linux kernel features not emulated in these environments. In such cases, switching to WSL usually resolves the issue.
Frequently Asked Questions (FAQ)
1. Can I run a .sh file by simply double-clicking it in Windows 11? No, not by default. Windows doesn’t associate .sh files with a shell interpreter out of the box. You need to use WSL, Git Bash, Cygwin, or a similar tool to execute it via a terminal.
2. Which method is best for beginners? Git Bash is generally the easiest and fastest to set up for beginners, especially if you just need to run occasional scripts. For long-term or Linux-heavy development work, WSL is worth the extra setup effort.
3. Do I need administrator rights to run shell scripts in Windows 11? Installing WSL typically requires administrator access. Git Bash and Cygwin installations may also request elevated permissions, though running the scripts themselves afterward usually doesn’t require admin rights.
4. Is WSL free to use? Yes, WSL is a free feature built into Windows 11 and doesn’t require any additional licensing.
Conclusion
Running shell script files in Windows 11 is no longer the hassle it once was. Thanks to tools like the Windows Subsystem for Linux, Git Bash, and Cygwin, you have multiple reliable paths to execute .sh files without needing to dual-boot or switch to a separate machine entirely.
For most developers, WSL is the best long-term solution, offering a true Linux experience with full command compatibility. If you need something lighter and faster to set up, Git Bash is a great choice for simple, everyday scripts. Cygwin remains a solid alternative if you’re already familiar with its ecosystem, and calling shell scripts through PowerShell is ideal for integrating them into broader Windows automation workflows.
Whichever method you choose, understanding why Windows needs these tools — and how each one handles compatibility differently — will help you troubleshoot issues faster and choose the right approach for your specific project. With the right setup, running shell scripts on Windows 11 becomes just as seamless as it is on Linux or macOS.





