Geeksdigit Team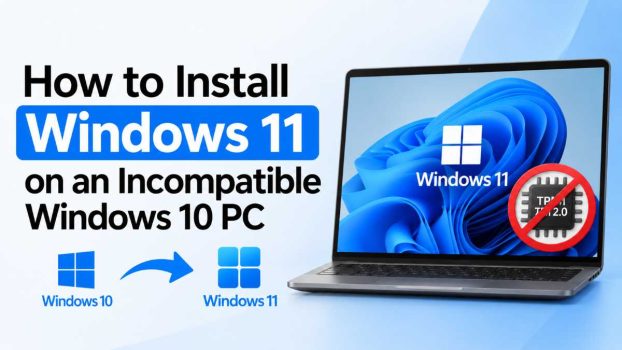
When Microsoft launched Windows 11, it came with a strict list of hardware requirements that left millions of otherwise capable PCs behind. TPM 2.0, Secure Boot support, a supported 8th-generation-or-newer processor, and specific RAM and storage minimums are all checked before the operating system will install through the normal path. If your PC fails even one of these checks, the installer simply refuses to continue — regardless of how well the machine actually runs day-to-day tasks.
This has become an increasingly pressing issue since Windows 10 reached the end of its mainstream support on October 14, 2025. While Microsoft’s Extended Security Updates (ESU) program can keep Windows 10 patched for a while longer, that bridge is temporary. For many people, moving to Windows 11 on hardware that “shouldn’t” support it is the most practical way to keep a perfectly good computer secure and usable.

The good news is that Microsoft’s hardware checks are largely software-enforced rather than hard technical barriers. In most cases, the underlying hardware can run Windows 11 just fine — it’s the installer that draws an arbitrary line. Over the past few years, the community has developed several reliable ways to bypass these checks, ranging from a single registry tweak to fully customized installation media.
This guide walks through the most current, tested methods for installing Windows 11 on unsupported hardware, what trade-offs each method involves, and how to decide which approach fits your situation. As with any workaround that goes against a vendor’s official recommendations, it’s worth understanding the risks before you start — which we’ll cover as we go.
Before you do anything else: check exactly why your PC is being flagged as incompatible. Run tpm.msc to see if you have TPM 1.2, TPM 2.0, or no TPM module at all, and check msinfo32.exe to confirm whether your system uses UEFI or Legacy BIOS. Some machines have TPM 2.0 hardware built in but disabled in the BIOS (often listed as Intel PTT or AMD fTPM) — enabling that alone may resolve the issue without needing any bypass whatsoever.
Methods
Method 1: Enable Firmware TPM in BIOS (Try This First)
Many “incompatible” PCs from the last several years already contain a TPM 2.0-equivalent chip that’s simply switched off by default.
- Restart your PC and enter the BIOS/UEFI settings (usually by pressing F2, F10, F12, Del, or Esc during boot — check your manufacturer’s documentation).
- Look for a setting called Intel Platform Trust Technology (PTT), AMD fTPM, or simply TPM.
- Enable it, then save and exit.
- Also check that Secure Boot is available and enabled, and that your drive is partitioned as GPT rather than MBR (older Legacy BIOS installs often use MBR, which needs to be converted using a tool like
mbr2gptbefore Secure Boot will work).
If this resolves your compatibility check, you can install Windows 11 the normal way with no further workarounds needed — and you’ll keep full official support and update eligibility.
Method 2: Use Rufus to Create Bypass-Enabled Installation Media
If your hardware genuinely lacks TPM 2.0 or a supported CPU, Rufus is the simplest and most widely recommended tool for creating a Windows 11 USB installer that skips these checks automatically.
- Download a Windows 11 ISO directly from Microsoft’s official website.
- Download Rufus (free and open source) from its official site.
- Insert a USB drive of at least 8GB and open Rufus.
- Select your USB drive, then choose the Windows 11 ISO you downloaded.
- When prompted, choose “Extended Windows 11 Installation (no TPM / no Secure Boot / no online account)” or the equivalent checkbox options for disabling TPM, Secure Boot, and RAM checks.
- Click Start and let Rufus build the bootable drive.
- Boot from the USB and proceed through setup normally — the hardware checks will be skipped entirely.
This is currently the most reliable method because it handles the bypass automatically, without requiring manual registry edits partway through setup.
Method 3: Registry Edit During Setup (Manual Bypass)
This method works well if your only blocker is CPU support or an older TPM 1.2 chip, though it’s less effective for machines with no TPM at all.
- Create standard Windows 11 installation media using the Media Creation Tool or a manually mounted ISO.
- Boot from the USB and begin the setup process.
- When you reach the “This PC can’t run Windows 11” screen, press Shift + F10 to open a command prompt.
- Type
regeditand press Enter. - Navigate to
HKEY_LOCAL_MACHINE\SYSTEM\Setup\MoSetup. - Right-click in the right pane, choose New > DWORD (32-bit) Value, and name it
AllowUpgradesWithUnsupportedTPMOrCPU. - Set its value to
1. - Close the Registry Editor and command prompt, then go back and click “Back” and “Next” in the setup wizard to re-trigger the compatibility check.
You can also make this registry change from within a working Windows 10 installation before running setup.exe, which works for in-place upgrades.
Method 4: Bypass Using setup.exe /product server
An alternative to registry editing, this method tricks the installer into thinking it’s installing a server product, which uses a different, more lenient set of compatibility checks.
- Extract your Windows 11 ISO to a folder.
- Open the
sourcesfolder inside the extracted files. - Create a shortcut to
setup.exe. - Right-click the shortcut, choose Properties, and add
/product server(with a leading space) to the end of the Target field. - Run the shortcut to launch setup — it will proceed without triggering the standard hardware checks.
This can also be run directly from an elevated Command Prompt by navigating to the sources folder and typing setup.exe /product server.
Method 5: Modify the ISO Directly (appraiserres.dll Replacement)
For a more permanent fix that survives future feature updates without repeating the bypass each time, some users replace or delete the appraiserres.dll file inside the installation media, which is responsible for running Microsoft’s compatibility checks. This is more advanced and involves mounting the ISO, deleting or renaming the file inside the sources folder, and rebuilding a bootable image — tools like Rufus have largely made this step unnecessary for most users, since it now handles the equivalent bypass automatically.
A Note on Virtual Machines
If you just want to test Windows 11 without touching your physical hardware, most hypervisors — including VMware, VirtualBox, and Hyper-V — will let you install Windows 11 without a virtual TPM enabled, making this a low-risk way to try it out first.
Risks and Trade-Offs to Understand
Before committing to any of these methods, it’s worth being clear-eyed about what you’re giving up:
- Update uncertainty: Microsoft’s official position is that unsupported devices aren’t entitled to updates. In practice, monthly cumulative updates have generally continued to install fine, but major feature updates (like moving from 23H2 to 24H2 or 25H2) have occasionally been blocked or required repeating the bypass.
- No official support: If something breaks, Microsoft support may simply point out that your configuration isn’t supported.
- Security considerations: TPM 2.0 and Secure Boot exist to provide hardware-level security protections. Running without them doesn’t make your PC dramatically less safe for everyday use, but it does remove a layer of protection against certain firmware-level attacks.
- Data safety: As with any OS installation, back up your files before you start. Clean installs will erase your drive, and even in-place upgrades carry some risk.
None of this means the workarounds are dangerous or unreliable for ordinary use — millions of people are running Windows 11 this way without issue. It simply means you’re accepting a different risk profile than an officially supported installation.
Conclusion
Windows 11’s hardware requirements were designed with modern security standards in mind, but they’ve also left a large number of capable, everyday PCs stranded — especially now that Windows 10 support is winding down. Fortunately, the barrier is mostly a software gate rather than a hard technical wall, and the methods above give you several ways around it depending on your comfort level and exactly what your PC is missing.
If your machine has a disabled TPM chip, start there — it’s the cleanest fix with no downsides. If you’re missing TPM entirely or have an unsupported CPU, Rufus offers the most user-friendly path, while the registry edit and /product server methods give you more manual control if you prefer building your own installation media. Whichever method you choose, back up your data first, keep your expectations realistic about future update behavior, and you can keep getting real, current use out of hardware that Microsoft has otherwise written off.
FAQ
1. Will my unsupported Windows 11 installation still get updates? Cumulative monthly security updates have generally continued to work without issue on bypassed installations. Major feature updates are less predictable — they sometimes install cleanly and sometimes get blocked, occasionally requiring you to reapply the bypass. Microsoft’s official stance is that unsupported devices aren’t guaranteed any updates at all.
2. Is this legal, and does it violate my Windows license? Yes, this is legal. You’re installing Windows using official Microsoft installation media and a valid license — you’re simply bypassing a hardware eligibility check, not pirating software. Microsoft explicitly acknowledges these bypass methods exist and only warns that the resulting installation won’t be officially supported.
3. Can I go back to Windows 10 if something goes wrong? Yes. You can reinstall Windows 10 from official Microsoft media at any time using your existing license. Just keep in mind that Windows 10 reached the end of mainstream support on October 14, 2025, with Extended Security Updates available only until around October 2026, after which point it will no longer receive patches at all.
4. Which method should I use if I’m not comfortable editing the registry? Rufus is the best option for most people. It handles the entire bypass — TPM, Secure Boot, CPU, and RAM checks — through simple checkboxes when creating your installation USB, so you never have to manually edit anything during setup.



![How to Boot into Windows 11 Safe Mode [5 Easy Methods]](https://www.geeksdigit.com/wp-content/uploads/2026/09/How-to-Boot-into-Windows-11-Safe-Mode-336x220.jpg)