Geeksdigit Team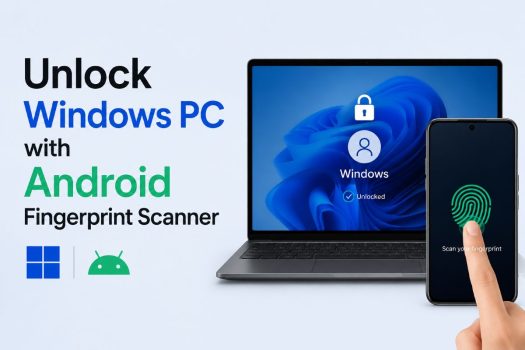
Biometric sign-in has become the default way most of us unlock our devices. Tap a sensor, glance at a camera, and you’re in — no more fumbling for a password at 7 a.m. Windows Hello brought this convenience to PCs years ago, but there’s a catch: it only works if your laptop or desktop has a compatible fingerprint reader or infrared camera built in. If you’re using an older laptop, a budget machine, or a desktop PC with no biometric hardware at all, you’re stuck typing a password or PIN every single time.
Here’s the good news — you almost certainly already own a fingerprint scanner. It’s sitting in your pocket. Nearly every Android phone released in the last several years has a fast, accurate fingerprint sensor, and with the right combination of apps, you can turn that sensor into an authentication device for your Windows PC. Instead of buying an external USB fingerprint reader or a new Windows Hello-compatible laptop, your phone can do the job over your home Wi-Fi network.

This guide walks through the most widely used method for pulling this off, using an Android app called Remote Fingerprint Unlock paired with a companion module on the Windows side. <cite index=”4-1″>This app lets your Android phone’s fingerprint sensor serve as an authentication device for your PC.</cite> It’s free, doesn’t require any special hardware beyond your existing devices, and takes about ten minutes to set up. We’ll also cover what’s happening under the hood, the security trade-offs worth knowing about, and answers to the questions people ask most often before trying this out.
Before diving in, it’s worth setting expectations correctly. This isn’t a Microsoft-built feature — it’s a third-party workaround that uses your phone as a companion authenticator over the local network. This setup requires trust: you are giving a mobile app and a Windows service the ability to interact with your sign-in process. That doesn’t mean it’s unsafe, but it does mean you should treat the setup with the same care you’d give any tool that touches your login credentials.
Method: Setting Up Remote Fingerprint Unlock
The overall workflow is straightforward: install an app on your phone, install a small credential module on your PC, connect the two over your local network, and link your Windows account so a fingerprint tap on your phone can trigger a sign-in on your computer. Here’s how it breaks down step by step.
Step 1: Check the requirements
Before you start, make sure both devices are ready:
- An Android phone with a working fingerprint sensor. Most phones from the last several years qualify.
- A Windows 10 or Windows 11 PC. Note that Arm64, also known as Windows on Arm devices, aren’t supported by this particular app, so this method is best suited to standard x86/x64 Windows machines.
- Both devices connected to the same local network. To unlock your PC, both devices must be connected to the same network, so make sure your phone and PC are on the same Wi-Fi (not, for example, your phone on mobile data and your PC on Wi-Fi).
- Administrator access on your PC, since you’ll be installing a background service.
Step 2: Install the Windows Fingerprint Credential module
On your PC, download and install the Windows Fingerprint Credential module, which is the companion piece that talks to your phone. When you launch the installer, <cite index=”4-1″>click Yes to allow the module to automatically create the necessary TCP/UDP rules, so the two modules can communicate.</cite> If you use a third-party firewall instead of Windows Defender Firewall, you may need to manually allow those TCP/UDP connections, since automatic rule creation typically only covers the built-in firewall.
Because this module needs to communicate over your network and interact with the Windows sign-in process, it’s worth downloading it only from the developer’s official page or a reputable tech publication, and verifying the file’s integrity if a checksum is provided, rather than grabbing it from a random third-party mirror.
Step 3: Install the Remote Fingerprint Unlock app on Android
Head to the Google Play Store and install the Remote Fingerprint Unlock app, built by XDA Forums developer Andrew-X. This is available for free on the Play Store, with an in-app purchase to disable ads and enable some additional features like widget support. There’s also a Pro tier that adds features such as Wake-on-LAN, letting your fingerprint tap wake a sleeping PC before unlocking it, which is handy if you tend to fully power down or hibernate your machine.
When you first open the app, it will prompt you to scan your fingerprint to generate a unique cryptographic key pair used for authentication — this is a one-time setup step tied to that specific phone-and-app installation.
Step 4: Put your PC on the lock screen
The credential module only becomes active while your PC is sitting at the Windows lock screen, so before connecting the two devices, lock your computer. You can do this by pressing Windows key + L, or by clicking your account icon in the Start menu and selecting Lock.
Step 5: Scan for and connect to your PC
Back on your phone, open the Remote Fingerprint Unlock app and go to the Scan section from the hamburger menu. Swipe down to scan for devices and select your laptop, then tap on the PC you want to set up. You’ll have the option to give the device a custom name, which is useful if you’re setting this up on more than one PC.
Once selected, you should see a new tile on your PC’s lock screen labeled something like “Fingerprint Unlock.” This isn’t a new user account but simply a link to your selected account. Both the app and the lock screen will display a matching Session ID — check that the numbers on your phone and PC screen are identical before continuing. If they don’t match, back out and repeat the scan step, since a mismatch usually means the module picked up a different network session.
Step 6: Link your Windows login credentials
Next, tell the app which Windows account to sign into. On your phone, go to the menu and select My Accounts, choose the PC you just added, and tap Add Account. Enter the username and password for the Windows or Microsoft account you normally use to log in, then confirm with your fingerprint. The app stores this credential locally and encrypted, using it only to complete the sign-in handshake when you authenticate.
Step 7: Unlock with a tap
With setup complete, go to the Unlock section of the app — which becomes the default screen once configuration is finished — and touch your phone’s fingerprint scanner. Your PC’s lock screen should recognize the request and sign you in automatically, no keyboard needed. From this point on, whenever your PC is locked and both devices are on the same network, a single fingerprint tap on your phone is all it takes.
A note on security
A few sensible precautions are worth building into your routine here:
- Keep your phone’s own lock screen secure. Since your phone is now effectively a key to your PC, a phone without its own PIN, pattern, or biometric lock defeats the purpose.
- Use a trusted, private Wi-Fi network. Avoid setting this up or using it over public or shared networks where device discovery could be exploited.
- Keep a backup sign-in method available. Don’t disable your Windows password or PIN entirely — keep it as a fallback in case your phone is lost, dead, or out of range.
- Update both apps regularly. As with any third-party tool that handles credentials, installing updates promptly helps you get security fixes as they’re released.
Frequently Asked Questions
1. Do I need any special hardware to make this work? No. This method is specifically designed for PCs that lack a built-in fingerprint reader. As long as your Android phone has its own fingerprint sensor and your PC has Wi-Fi, no additional hardware purchase is required.
2. Does this work if my phone and PC are on different networks? No — the unlock request travels over your local network, so both devices need to be connected to the same Wi-Fi network for the app to detect and communicate with your PC. Using mobile data on your phone while your PC is on Wi-Fi will prevent the devices from finding each other.
3. Is my Windows password safe using this method? The app is designed so your credentials are stored locally on your phone and used only to complete the sign-in handshake, rather than being transmitted in plain text. That said, any tool that stores your login credentials carries some inherent risk, so it’s worth keeping your phone itself locked down with its own strong authentication and keeping both apps updated.
4. Can this method wake up a PC that’s fully asleep or powered off? With the free version, your PC generally needs to already be at the lock screen. The Pro version of the Android app adds Wake-on-LAN support, which can send a signal to wake a sleeping PC before triggering the unlock, though this typically requires Wake-on-LAN to be enabled in your PC’s BIOS/UEFI and network adapter settings first.
Conclusion
You don’t need to buy a new laptop or an external USB fingerprint reader to enjoy biometric sign-in on Windows. If you already own an Android phone with a fingerprint sensor, apps like Remote Fingerprint Unlock let you repurpose that hardware as a wireless authenticator for your PC, turning a routine password prompt into a single tap. The setup takes a handful of steps — installing a credential module on Windows, pairing it with the Android app over your local network, and linking your account credentials — but once it’s done, unlocking your computer becomes noticeably faster and more convenient.
As with any tool that interacts with your sign-in credentials, it’s worth being deliberate about where you download the software from, keeping both your phone and PC protected with their own baseline security, and holding onto a traditional password as a fallback. Used thoughtfully, this kind of setup brings genuinely useful Windows Hello-style convenience to PCs that were never designed to support it — no extra hardware required.