
 Sukhdev Kamboj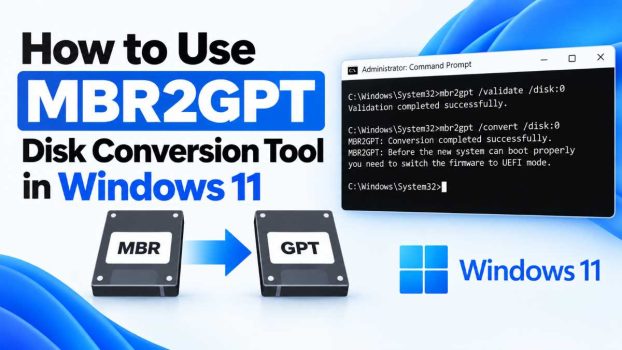
If you’ve been running Windows 11 on a drive that still uses the old MBR (Master Boot Record) partitioning scheme, you’ve probably run into some frustrating limitations. MBR disks cap out at four primary partitions and struggle with drives larger than 2TB, and — more importantly for Windows 11 users — many of the platform’s advanced security features, like UEFI Secure Boot and hardware-based encryption, only work properly on GPT (GUID Partition Table) disks.
The good news is that Microsoft built a tool specifically to solve this problem: MBR2GPT.exe. This built-in command-line utility converts a disk from MBR to GPT partition style without deleting your data, reinstalling Windows, or wiping your applications. It’s one of the few migration tools that lets you switch the underlying disk structure of a live system in place.
That said, MBR2GPT isn’t a tool you want to run blindly. A partition table conversion touches the very foundation of how your drive boots and stores data, so a mistake — or an interrupted process — can leave your system unbootable. In this guide, we’ll walk through what MBR2GPT actually does, the different methods you can use to run it safely in Windows 11, common pitfalls, and answers to the questions people ask most often before attempting the conversion.
By the end, you’ll know exactly how to check whether your system is a good candidate for conversion, how to run the tool step by step, and what to do if something goes wrong.
What Is MBR2GPT and Why Would You Use It?
MBR2GPT is a command-line tool that has shipped with Windows since the Windows 10 Creators Update (version 1703) and continues to be included in Windows 11. It’s located at C:\Windows\System32\MBR2GPT.exe, meaning no download or installation is required — it’s already on your machine.
The tool converts the partition style of a disk from MBR to GPT while preserving all existing data and partitions. This matters because switching to GPT unlocks:
- UEFI boot mode, which is required for Secure Boot
- TPM-backed features like BitLocker in some configurations and, notably, official Windows 11 upgrade eligibility on certain hardware checks
- Support for disks larger than 2TB and more than four partitions
- Faster boot times in many cases, since UEFI firmware initializes differently than legacy BIOS
If you’re upgrading an older PC to Windows 11, or you inherited a machine that was originally set up with legacy BIOS/MBR, this tool is often the missing piece that lets you flip the system firmware to UEFI mode without a clean reinstall.
Before You Begin: Requirements and Precautions
Before touching the partition table, take these precautions seriously — this is not a step to skip.
- Back up your data. While MBR2GPT is designed to be non-destructive, any operation that rewrites partition metadata carries risk. Use File History, a full disk image, or copy critical files to external storage first.
- Check your firmware supports UEFI. MBR2GPT converts the disk, but your motherboard also needs to support switching from Legacy BIOS to UEFI mode. Most PCs made in the last decade do, but very old hardware may not.
- Confirm the disk is a system disk with a supported layout. MBR2GPT works on the disk containing the currently running Windows installation. It expects a standard layout (System Reserved partition, Windows partition, Recovery partition).
- Free up disk space. The tool needs a small amount of unallocated space to create new GPT-required partitions (like the EFI System Partition) if they don’t already exist.
- Note your BitLocker status. If BitLocker is enabled, you’ll want to suspend it before conversion and firmware mode switching, then re-enable it afterward.
With those precautions in place, let’s look at the actual methods for running the conversion.
Methods to Use MBR2GPT in Windows 11
There are a few different contexts in which you can run MBR2GPT, depending on your situation. We’ll cover the three most common approaches: running it from within Windows, running it from the Windows Recovery Environment, and using the validation-only mode to test safely first.
Method 1: Validate the Disk Before Converting (Recommended First Step)
Before making any changes, you should always run MBR2GPT in validation mode. This checks whether your disk is eligible for conversion without altering anything.
- Press Start, type
cmd, right-click Command Prompt, and choose Run as administrator. - In the elevated Command Prompt window, type the following command and press Enter:
mbr2gpt /validate
- If your disk is running the currently booted Windows installation, you’ll typically need to add the
/allowFullOSflag, since by default the tool expects to run from Windows Recovery Environment (WinRE):
mbr2gpt /validate /allowFullOS
- Review the output. A successful validation will state that “Validation completed successfully” — this confirms your disk layout is compatible.
If validation fails, the tool will usually tell you why (for example, too many partitions, insufficient free space, or an unsupported disk layout). Resolve the reported issue before proceeding.
Method 2: Convert the Disk While Running Windows (Live OS Conversion)
Once validation succeeds, you can proceed with the actual conversion from inside your running Windows 11 installation.
- Open an elevated Command Prompt as described above.
- Run:
mbr2gpt /convert /allowFullOS
- The tool will validate the disk again and then perform the conversion, which usually takes just a minute or two since it’s only rewriting partition metadata, not moving large amounts of data.
- Once complete, you’ll see a message confirming the conversion was successful.
- Shut down the computer (don’t just restart) and enter your motherboard’s firmware/BIOS settings (usually by pressing F2, F10, F12, Del, or Esc during boot — this varies by manufacturer).
- Locate the boot mode setting and switch it from Legacy/CSM/BIOS to UEFI. Save changes and exit.
- Boot back into Windows. If everything was done correctly, Windows should boot normally under UEFI mode, and you can confirm this by checking System Information (
msinfo32) — the “BIOS Mode” field should now read “UEFI” instead of “Legacy.”
Method 3: Convert the Disk from Windows Recovery Environment (WinRE)
This method is considered the “intended” way to run MBR2GPT, since it doesn’t require the /allowFullOS flag and operates outside the live OS, reducing risk.
- Go to Settings > System > Recovery, and under “Advanced startup,” click Restart now. Alternatively, hold Shift while clicking Restart from the Start menu.
- In the blue Windows Recovery Environment screen, navigate to Troubleshoot > Advanced options > Command Prompt.
- In the WinRE Command Prompt, first identify your Windows drive letter (it may not be C: in this environment) by running:
   diskpart
   list volume
   exit
- Once you’ve confirmed the correct drive letter, run validation:
mbr2gpt /validate /disk:0
- If validation succeeds, run the conversion:
mbr2gpt /convert /disk:0
- Exit the recovery environment, enter your BIOS/UEFI firmware settings, switch the boot mode to UEFI as described in Method 2, and restart into Windows.
Method 4: Using MBR2GPT with Additional Parameters for Troubleshooting
If you run into issues, a few additional parameters can help diagnose or work around them:
/map:X— allows conversion of a disk other than disk 0 (specify the disk number)./logs— displays the location of log files generated during conversion, useful for troubleshooting failed attempts.
For example, to see detailed logs after a failed conversion attempt, check %windir%\setupact.log and %windir%\setuperr.log, which the tool writes to automatically.
What to Do If the Conversion Fails
If validation or conversion fails, common culprits include:
- Too many partitions on the disk (GPT system disks are generally expected to follow a specific layout MBR2GPT recognizes).
- Insufficient free space to create the EFI System Partition — you may need to shrink an existing partition using Disk Management to free up roughly 100–300MB.
- Disks with more than one operating system installed, which the tool doesn’t support for conversion.
- Third-party partition management software that has left non-standard partition entries behind.
In most of these cases, resolving the underlying disk layout issue (via Disk Management or Diskpart) and re-running /validate will get you moving again.
Conclusion
MBR2GPT is a genuinely useful tool for anyone running Windows 11 on a system that’s still stuck in legacy BIOS/MBR mode. It lets you unlock UEFI-dependent features — Secure Boot, faster startup, support for larger and more numerous partitions — without the hassle of backing up everything, wiping the drive, and doing a clean install.
The key to using it safely comes down to three habits: always run /validate before /convert, make sure you have a current backup regardless of how confident the validation looks, and don’t forget the manual step of switching your firmware from Legacy to UEFI mode after the conversion completes — the tool only handles the disk structure, not the firmware setting. Skipping that last step is one of the most common reasons people think the conversion “didn’t work,” when in fact it succeeded but the system is still booting in the old mode.
Whether you run MBR2GPT from a live Windows session with /allowFullOS or from the Recovery Environment for a cleaner conversion, the process itself typically takes just minutes. Combined with a bit of patience during the BIOS-switching step, it’s a straightforward way to modernize your disk setup without disrupting the operating system you already have configured the way you like it.
Frequently Asked Questions
1. Will MBR2GPT delete my files or require me to reinstall Windows?
No. MBR2GPT is specifically designed to convert the partition style in place, preserving all your existing partitions, files, installed applications, and settings. That said, no tool that modifies partition tables is entirely risk-free, so a full backup beforehand is strongly recommended in case of an unexpected interruption (like a power loss mid-conversion).
2. Do I need to convert my disk from MBR to GPT to run Windows 11 at all?
Not necessarily. Windows 11 can run on MBR disks in some configurations, particularly if it was already installed that way. However, GPT is required if you want to enable UEFI-dependent features like Secure Boot, and some strict Windows 11 hardware compatibility checks are more easily satisfied when the system is running in full UEFI mode with GPT.
3. What happens if my computer won’t boot after switching to UEFI mode in the BIOS?
If this happens, go back into your firmware settings and switch the boot mode back to Legacy/CSM. Since the MBR2GPT conversion itself doesn’t take effect at the partition level until the firmware is also switched, reverting the firmware setting alone (assuming you haven’t made other changes) will typically let the system boot again on the still-valid MBR structure, since MBR2GPT doesn’t delete the original MBR data immediately in every scenario. If issues persist, boot into Windows Recovery Environment from installation media and use bootrec commands to repair the boot configuration.
4. Can I convert an external or secondary (non-system) disk with MBR2GPT?
MBR2GPT was designed specifically for the system disk containing the active Windows installation — the one from which the OS is currently booting. It is not intended as a general-purpose MBR-to-GPT converter for secondary data disks or external drives. For those, you can convert without data loss using third-party tools, or simply back up the data, delete the partitions, recreate the disk as GPT, and restore your files using Disk Management, since data drives don’t carry the added complexity of boot mode compatibility.





