Sukhdev Kamboj
The default arrow cursor that ships with Windows has barely changed in decades, and while it gets the job done, it isn’t for everyone. Maybe you find the standard pointer too small to track on a large or high-resolution monitor. Maybe you have vision difficulties and need higher contrast or a larger cursor size. Or maybe you just want to add a bit of personality to your desktop with a custom-themed cursor pack downloaded from the web.
Whatever your reason, Windows 10 and Windows 11 both give you several built-in ways to change your mouse pointer’s appearance, size, and color, and there are also ways to install entirely custom cursor packs from third parties. The good news is that the process is nearly identical across both operating systems, since Windows 11 largely carried over the same cursor engine from Windows 10 with a slightly reorganized Settings app.

In this guide, we’ll walk through four practical methods for changing your mouse pointer and cursor, ranging from the built-in Settings app to third-party cursor packs, plus a few tips on troubleshooting common issues. By the end, you’ll be able to pick the method that suits you best, whether you want a quick accessibility tweak or a full visual overhaul.
Method 1: Change Cursor Size and Color via Windows Settings
The simplest and most modern way to adjust your cursor is through the Settings app, which is especially useful if you just want a bigger, more visible, or higher-contrast pointer without downloading anything.
On Windows 11:
Open Settings (Windows key + I).
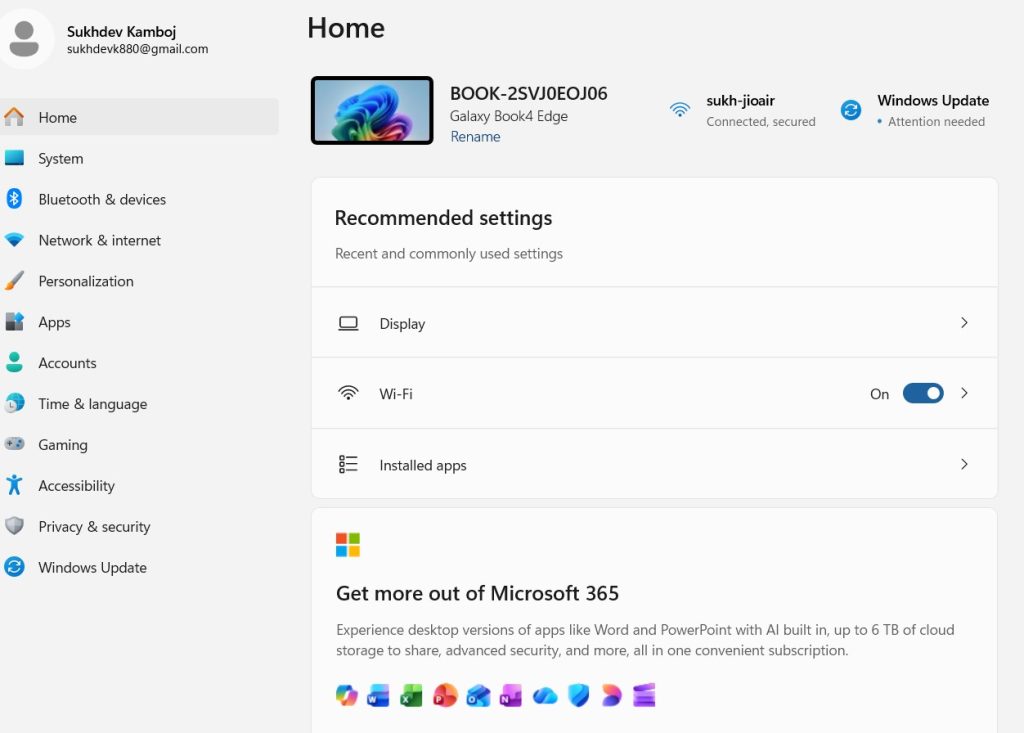
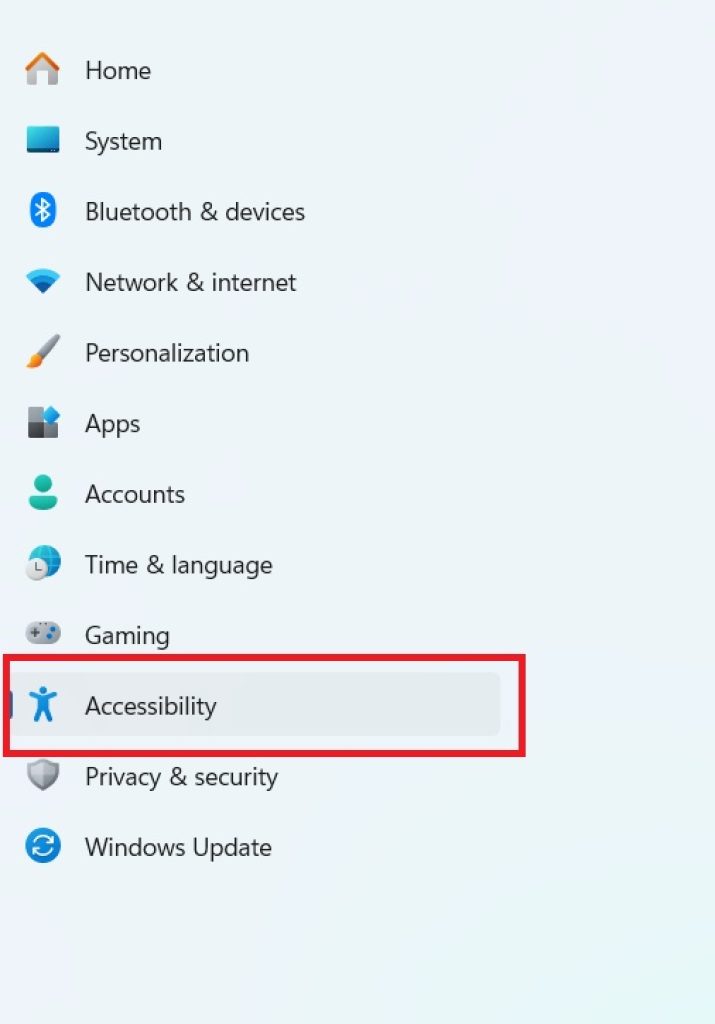
Go to Accessibility in the left sidebar.
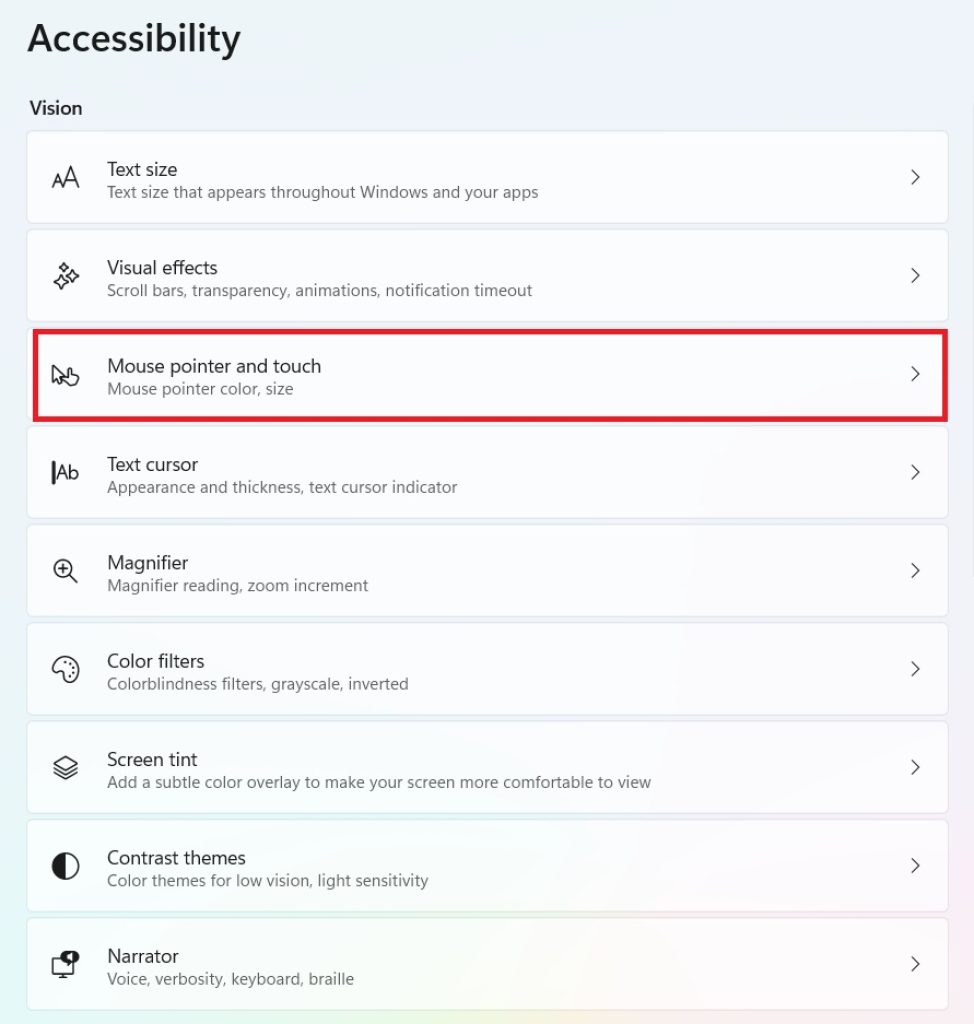
Click Mouse pointer and touch.
Under “Mouse pointer style,” you’ll see options including White, Black, Inverted, and a range of custom colors you can select from a color wheel.
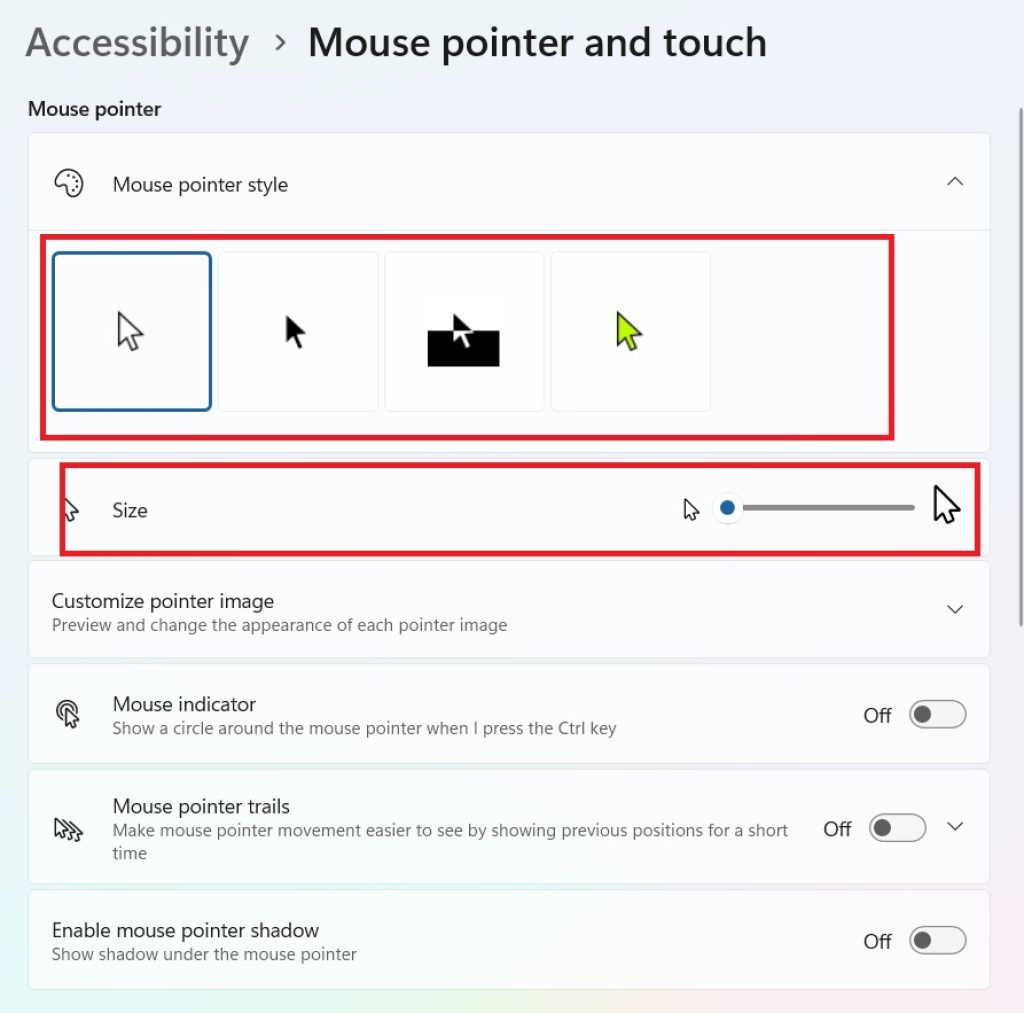
Use the Pointer size slider to make the cursor larger or smaller — this ranges from the standard size up to a much larger pointer that’s easy to spot even on 4K displays.
On Windows 10:
- Open Settings (Windows key + I).
- Go to Ease of Access.
- Select Mouse pointer (sometimes labeled Cursor & pointer in newer builds).
- Choose a pointer color (White, Black, Custom) and adjust the Change pointer size slider.
This method is ideal if your main concern is visibility rather than aesthetics. It doesn’t change the actual pointer shapes for different states (like the loading spinner or resize arrows) — it just recolors and resizes the existing set. For that level of customization, you’ll want Method 2.
Method 2: Customize Individual Pointer Schemes via Control Panel
If you want more granular control — for example, changing what the cursor looks like when you’re selecting text, resizing a window, or waiting for a program to load — you’ll need the classic Mouse Properties panel, which still exists in both Windows 10 and 11 despite Microsoft’s push toward the modern Settings app.
- Press Windows key + R, type
main.cpl, and hit Enter. (Alternatively, search “Mouse” in the Start menu and select Additional mouse settings or Change the mouse pointer display.) - In the Mouse Properties window, click the Pointers tab.
- Under “Scheme,” click the dropdown to browse Windows’ built-in pointer schemes. These include options like Windows Black, Windows Inverted, and various large and extra-large variants — useful presets that change the entire set of cursors at once (arrow, text select, busy, precision select, and so on).
- To customize an individual icon, select it from the list (for example, “Normal Select”) and click Browse to choose a different
.curor.anifile. - Once you’re happy with your choices, click Save As to save your custom combination as a new named scheme, so you can switch back to it easily later.
- Click Apply, then OK.
This is the most powerful built-in method because it lets you mix and match individual pointer states rather than applying a single uniform style. It’s also the entry point for Method 3, since custom cursor files are loaded exactly this way.
Method 3: Install a Custom Cursor Pack from the Web
If you’d like something more visually distinct — anime-themed cursors, minimalist designs, RGB gaming cursors, or pointer sets that match a desktop theme — you can download custom cursor packs and install them manually.
- Find a reputable source for cursor packs. Popular options include DeviantArt, WinCustomize, and dedicated cursor sites. Always download from trusted sources, since cursor files are executable-adjacent and a bad actor could disguise malware as a cursor pack.
- Extract the downloaded ZIP file (most cursor packs come compressed) to a permanent folder — ideally somewhere like
C:\Users\[YourName]\Cursors, since deleting the folder later will break the cursor if it’s actively applied. - Open Mouse Properties again (
main.cpl, then the Pointers tab). - Select each pointer type one at a time (Normal Select, Help Select, Working in Background, etc.) and click Browse to navigate to the extracted
.curor.anifiles, assigning the matching file to each role. - Once all the pointers are assigned, click Save As and give the scheme a name.
- Click Apply and OK to activate it.
Some cursor packs come with an .inf file instead of loose .cur/.ani files. In that case, right-click the .inf file and select Install, which will automatically register the cursor scheme so it appears in the Scheme dropdown in Mouse Properties without manual assignment.
A word of caution: because custom cursor files run as part of the shell, only download from sites with good reputations and scan files with your antivirus software before installing, just as you would with any other downloaded executable content.
Method 4: Use Third-Party Cursor Customization Software
For users who want an easier interface for managing multiple cursor sets, switching between them quickly, or creating animated cursors from scratch, dedicated third-party tools can simplify the process considerably.
- RealWorld Cursor Editor – A free tool for creating and editing your own
.curand.anifiles, useful if you want to design a completely custom cursor rather than download one. - CursorFX (from Stardock) – Offers animated, skinnable cursors with smooth transitions, though it’s a paid tool with more visual flair than the built-in Windows options.
- Cursor Manager apps available in the Microsoft Store – These provide a simplified interface for switching between installed cursor schemes without digging through Control Panel menus each time.
To use most of these tools:
- Download and install the software from its official website (avoid third-party download aggregators when possible).
- Launch the application and browse its built-in library or import your own cursor files.
- Apply the chosen cursor set directly through the software’s interface — most handle the registry changes and scheme-switching automatically.
- If you ever want to revert, these tools typically include a “Restore Default” or “Reset to Windows Default” button, which is more convenient than manually resetting each pointer in Control Panel.
This method is best suited to users who like to swap cursor styles often or who want smoother animated effects than the native .ani format easily supports.
Conclusion
Changing your mouse pointer in Windows 10 or Windows 11 is a small tweak that can make a real difference, whether your goal is better visibility, personal style, or accessibility. The Settings app is the fastest route for basic size and color changes, Mouse Properties in Control Panel gives you full control over individual pointer states, downloading a cursor pack lets you apply a completely custom look, and third-party software adds convenience and extra flair like animation for those who want to go further.
If you’re customizing for accessibility reasons, start with Method 1 — the built-in size and contrast options in Settings are specifically designed for that purpose and require no downloads. If you’re after a specific aesthetic or a themed desktop setup, Methods 2 and 3 will get you there, and Method 4 is worth exploring if you plan to switch cursor styles frequently.
Whichever method you choose, your changes are easy to reverse: just return to Mouse Properties and select the “Windows Default” scheme, or use the Reset option in Settings, to go back to the standard pointer at any time.
Frequently Asked Questions (FAQ)
1. Will changing my cursor affect other user accounts on the same PC?
No. Cursor schemes in Windows are applied per user profile. If you change your pointer style through Settings or Control Panel, it only affects your own account — other users on the same computer will still see their own default or custom cursor settings.
2. My custom cursor pack disappeared after a Windows update. Why?
This can happen occasionally after major feature updates, since Windows sometimes resets accessibility and personalization settings during the upgrade process. If this happens, simply reopen Mouse Properties and reselect your saved scheme from the dropdown — as long as the original cursor files weren’t deleted from their folder, the scheme should still be listed and reapply without needing to browse for each file again.
3. Can I change the cursor for just one app instead of system-wide?
Generally, no — Windows applies cursor schemes system-wide, not per application. However, some individual games and specialized software override the system cursor internally while they’re running, which is why you might notice a different cursor inside a specific game or program regardless of your Windows settings.
4. Is it safe to download custom cursor packs from the internet?
It can be, as long as you stick to well-known, reputable sites and scan downloaded files with antivirus software before installing them. Cursor files themselves (.cur and .ani) are not typically able to execute malicious code on their own, but installer packages bundled around them can contain unwanted software, so exercise the same caution you would with any other download.